
 What red blooded American hasn’t wanted to be able to tap a keg at home and pour yourself beer? Well if you home brew after a while you do get sick and tired of cleaning, sanitizing, filling, and capping bottles. The solution is to build yourself a kegerator to condition and serve beer draft style.
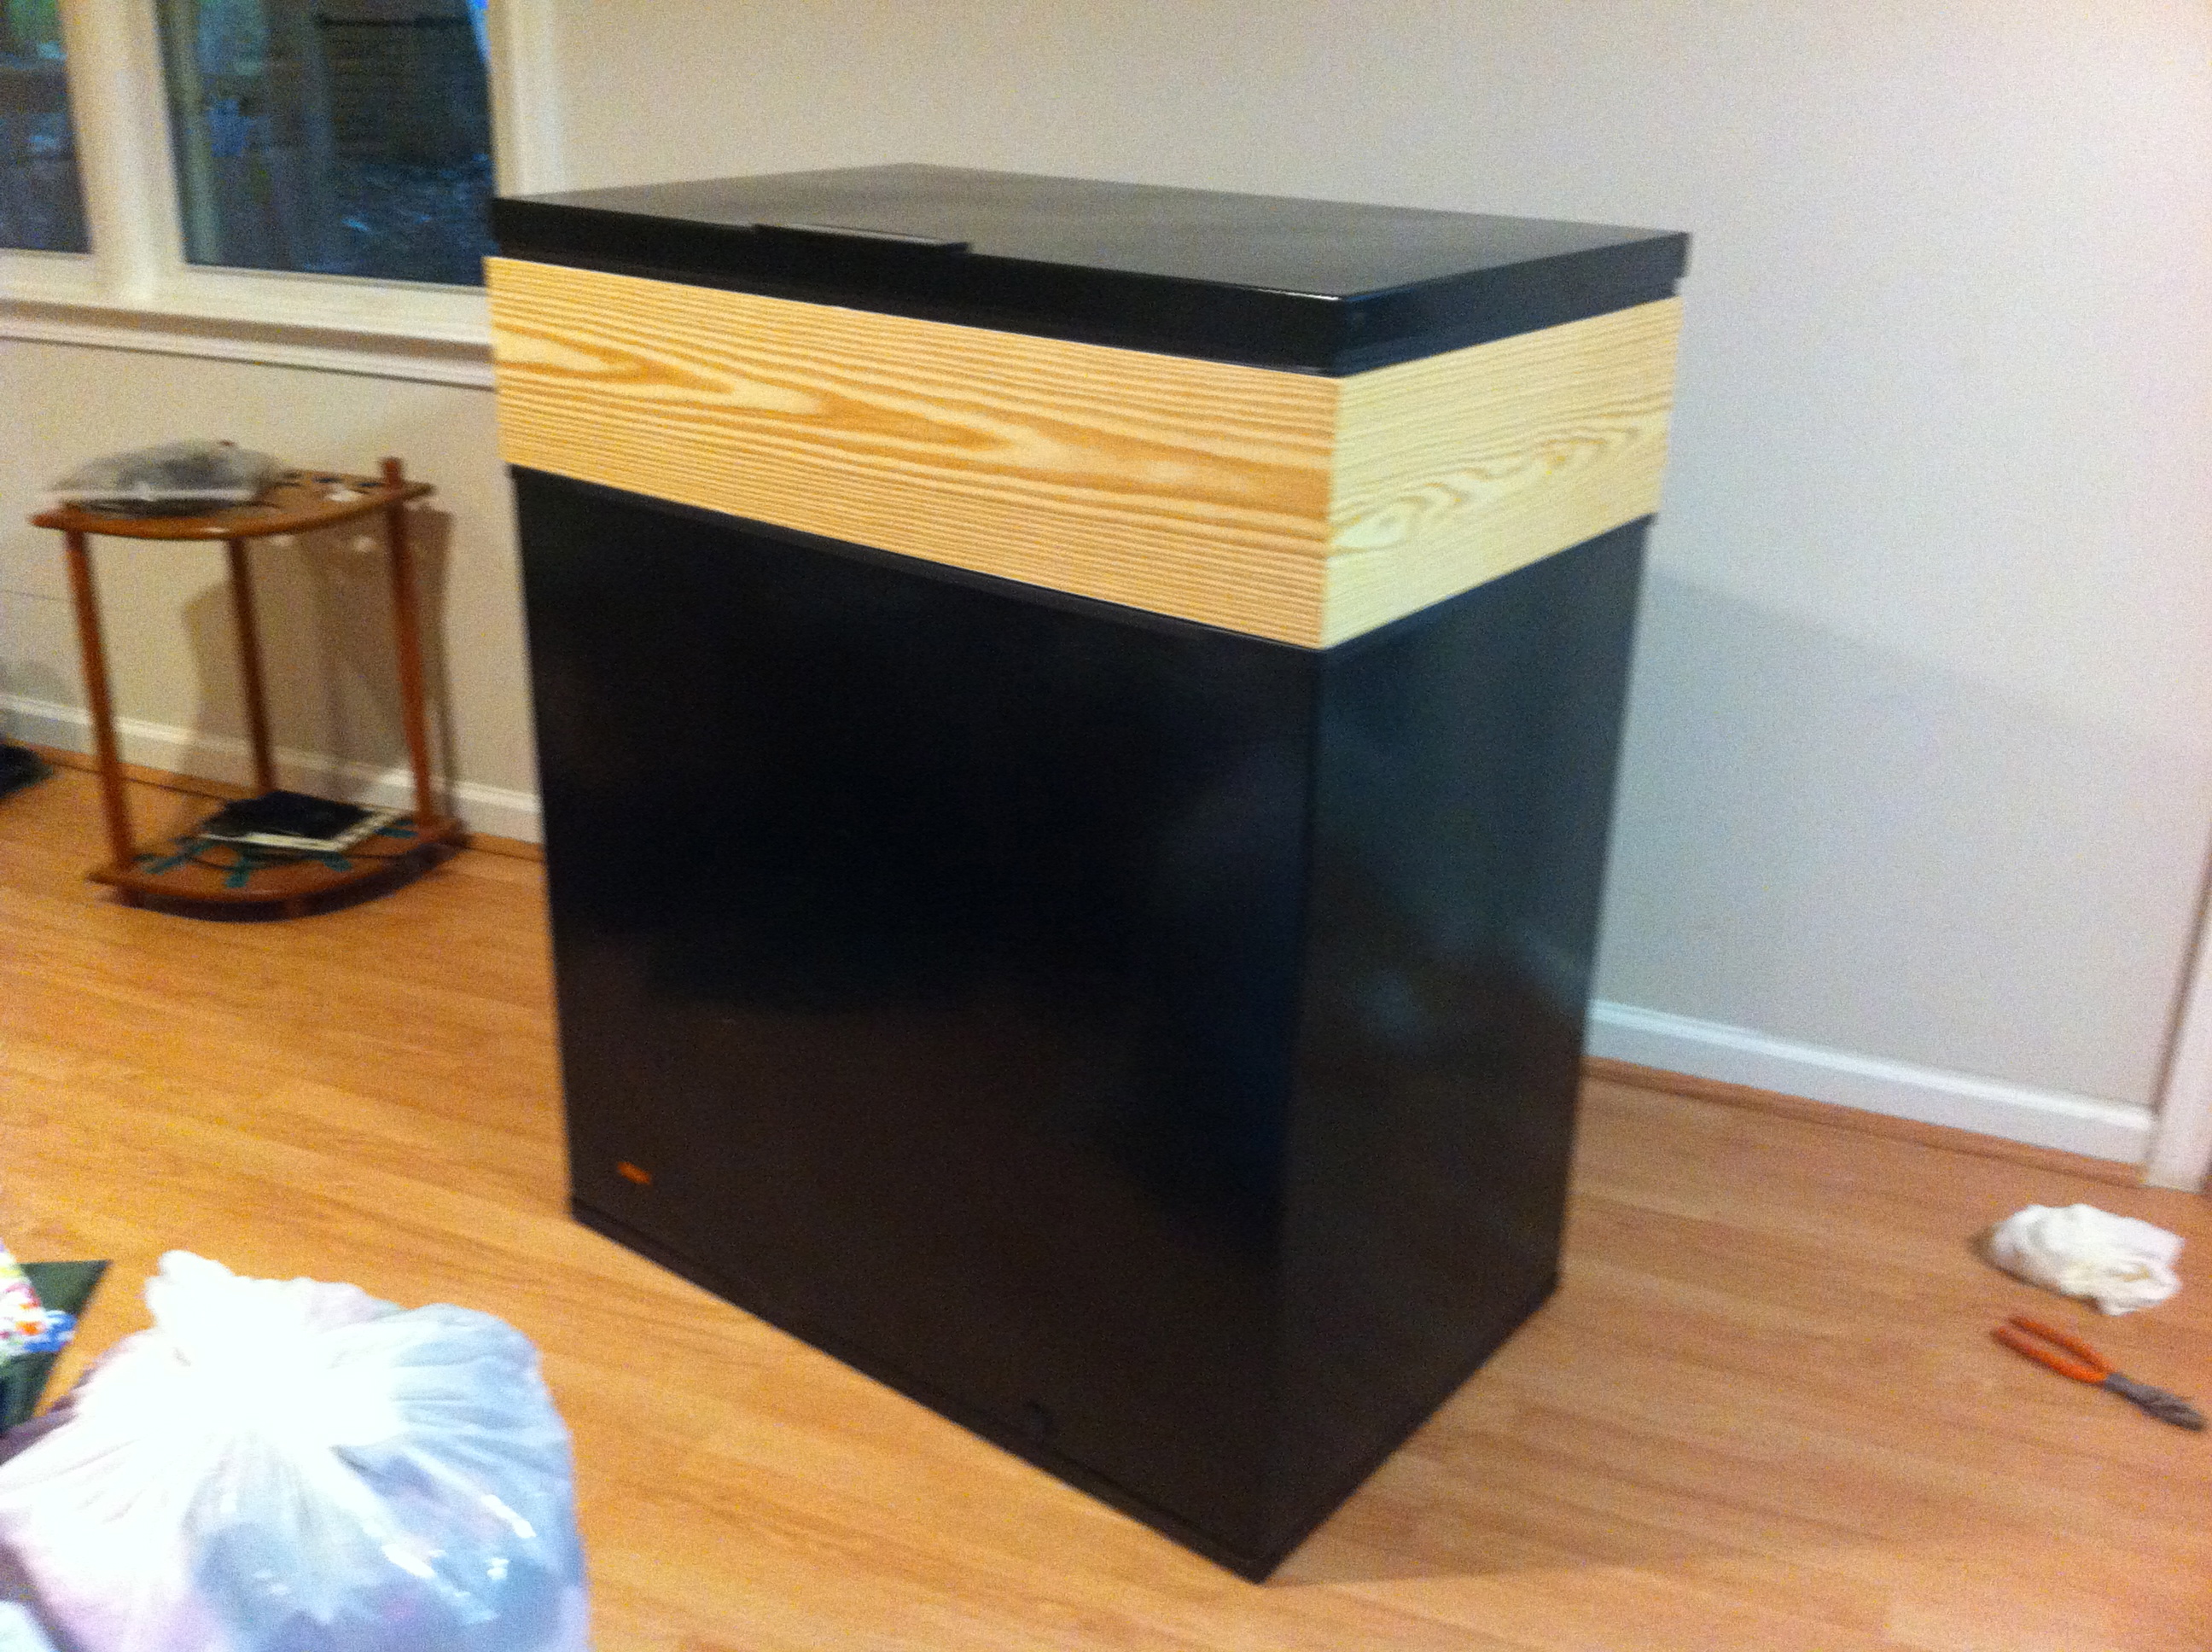
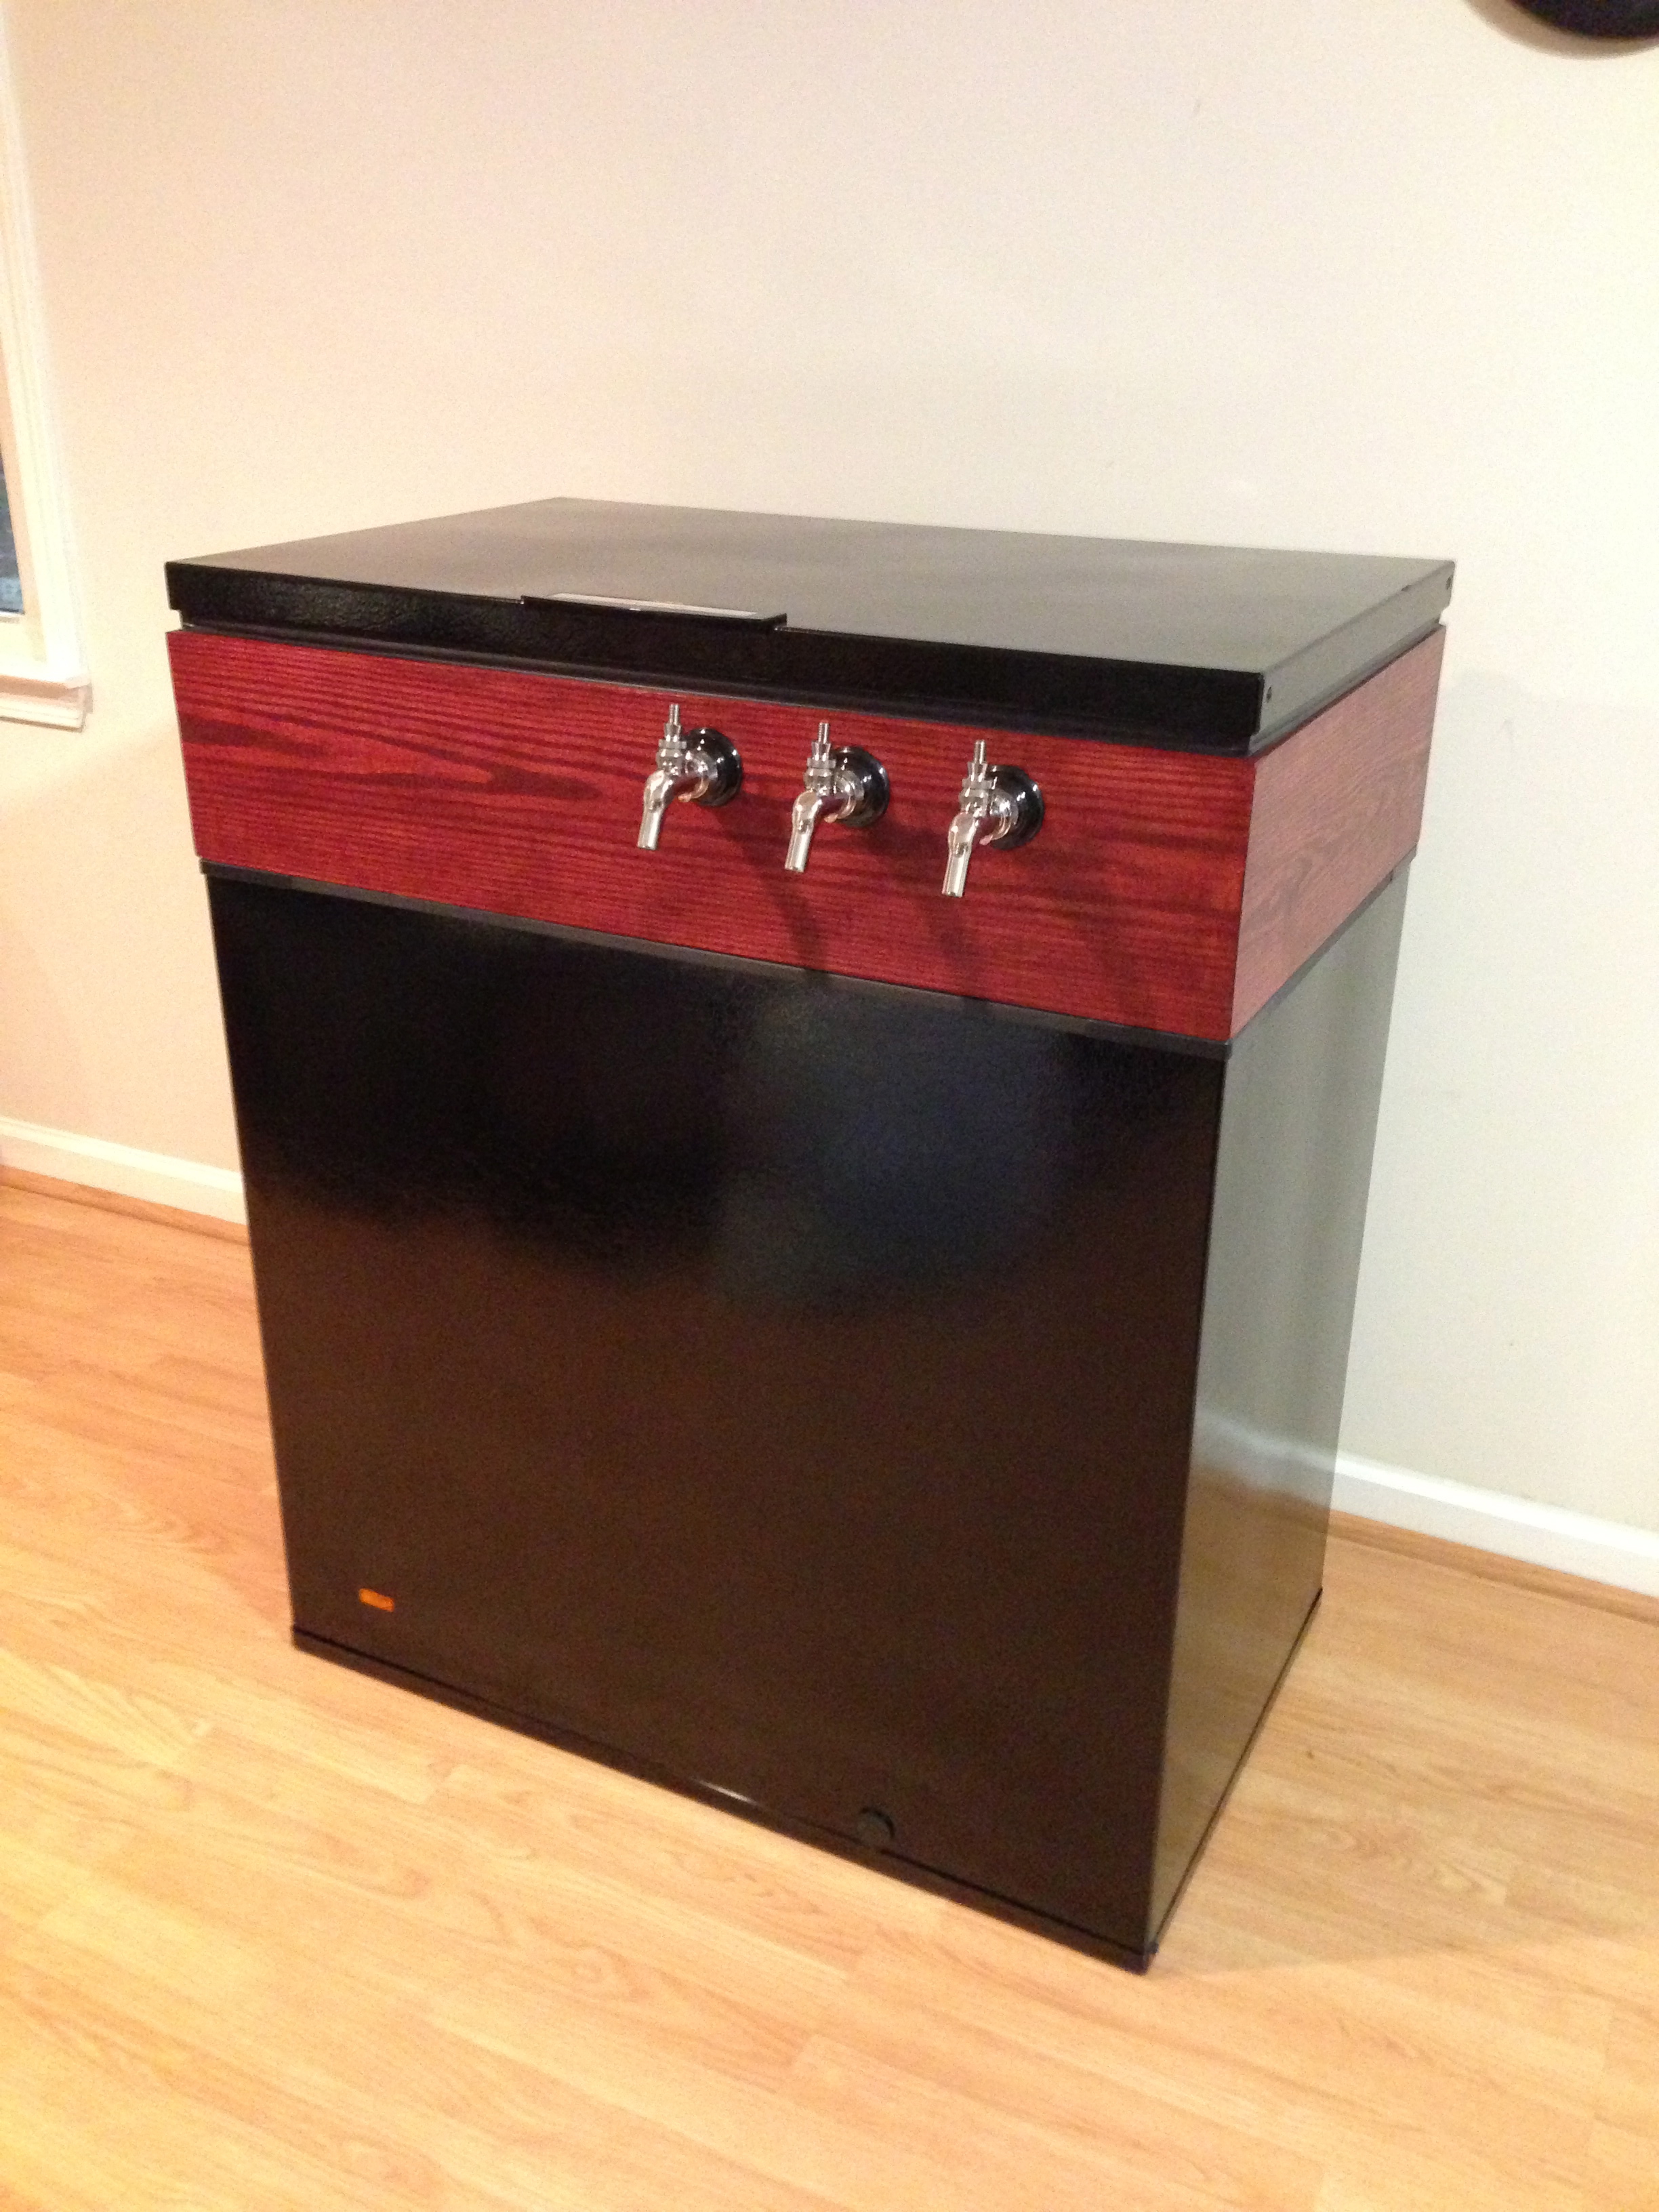
After performing research on all the best home brew web sites I was really inspired by the keezers I saw a decided to go that route. A keezer is a chest freezer that has been modified for use with beer.
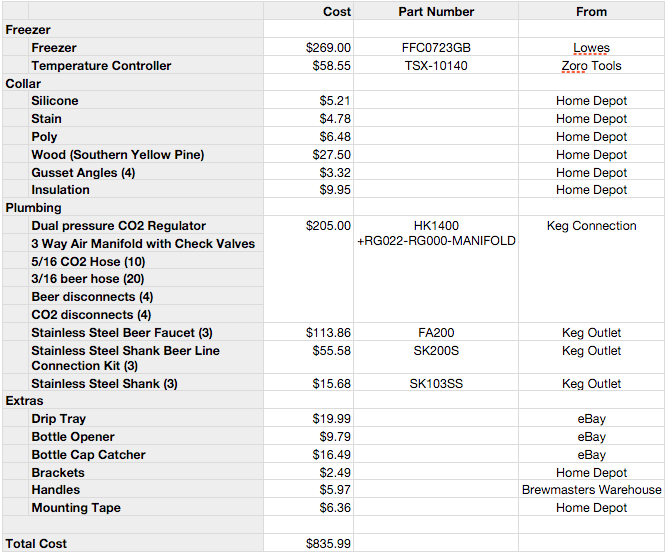
While the process to build a keezer seems simple it does involve some DIY skill including electrical wiring so this is not a project for everyone. Also, it is a more expensive project and the sky is the limit when customizing. Most people don’t cover the cost of a project like this is the various forums so I’ve included a breakdown of the costs in the gallery. The total cost for this project was $836 which doesn’t include the kegs, beer, or carbon dioxide.
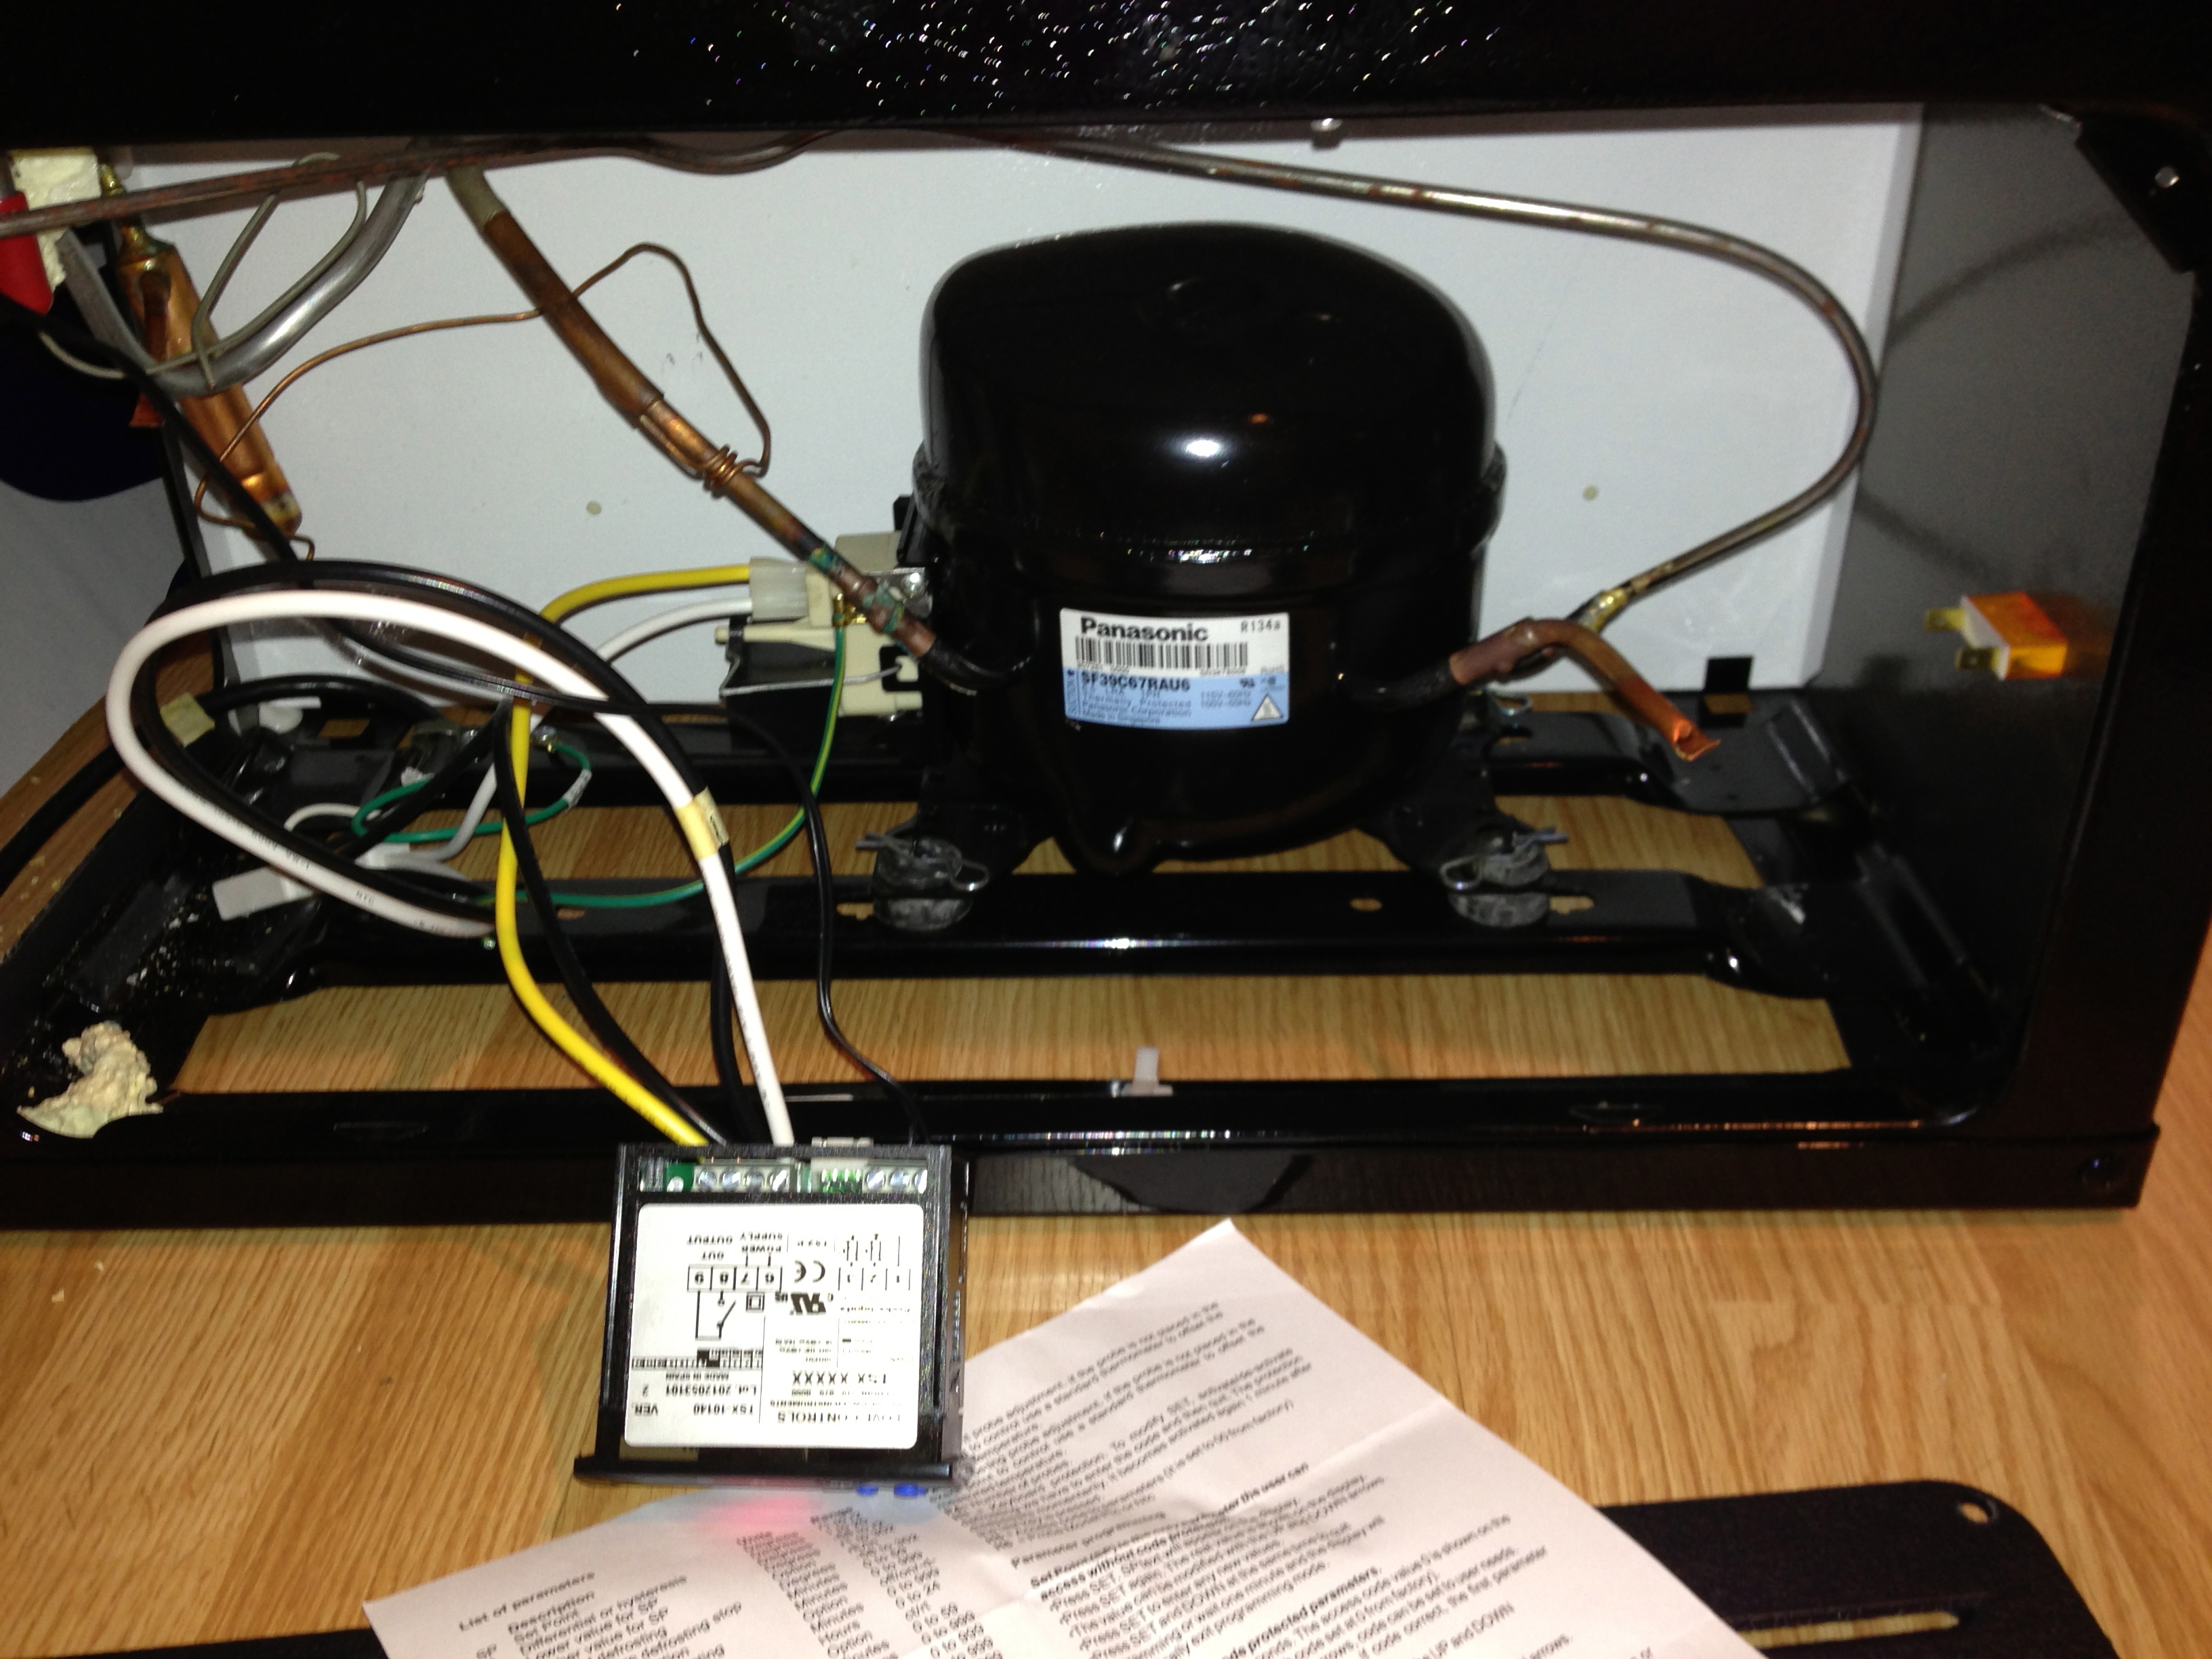
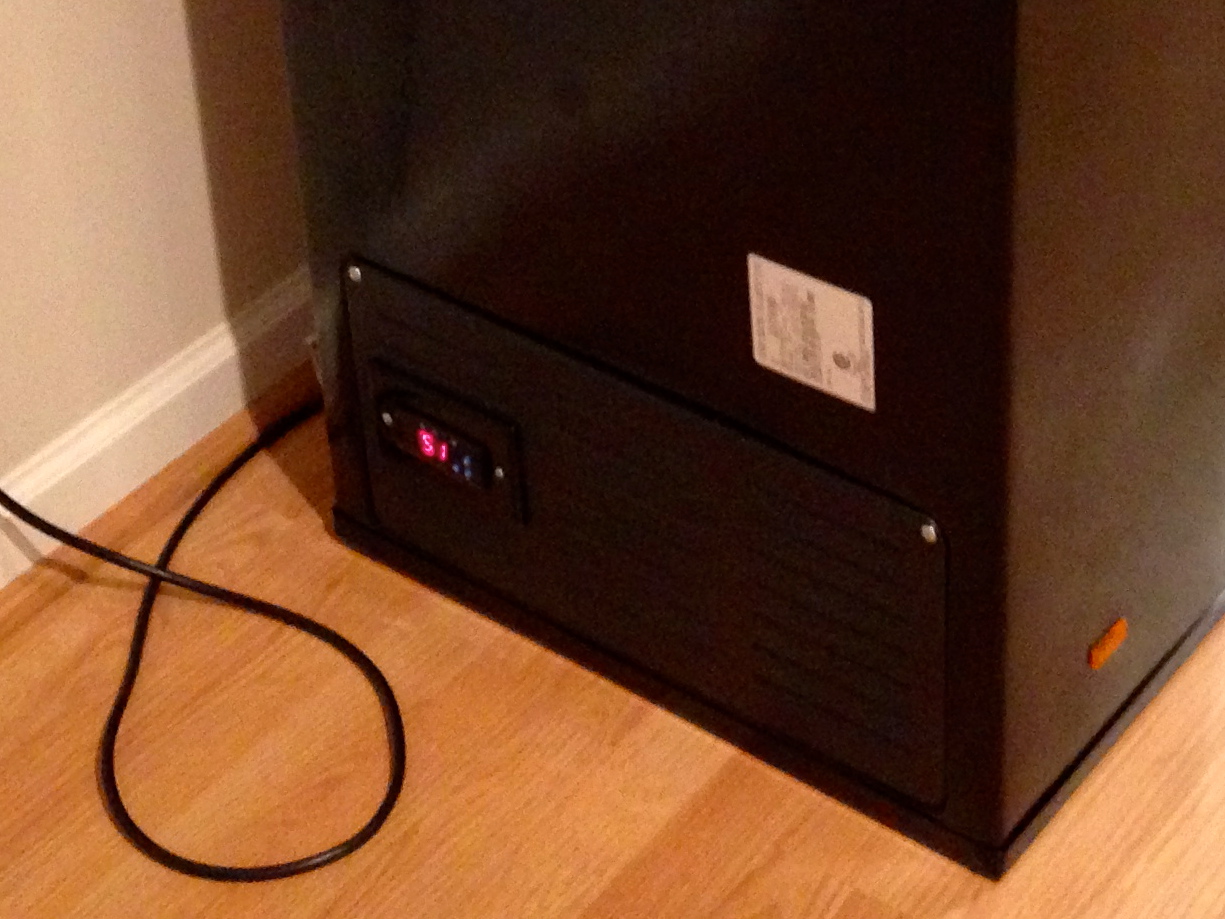
To begin the most important step is to turn this freezer in to a refrigerator. A typical chest freezer can’t run warm enough to serve beer. I started out by trying to adjust the existing controller’s coarse adjustment screw but that didn’t work on this model as I couldn’t get it to run about 34F. So the only other option was to swap out the temperature controller for one that has a much wider control range. I chose to go with a simple controller from Love Electronics. Once done this will allow the freezer to run at 43F which is perfect for most beer.
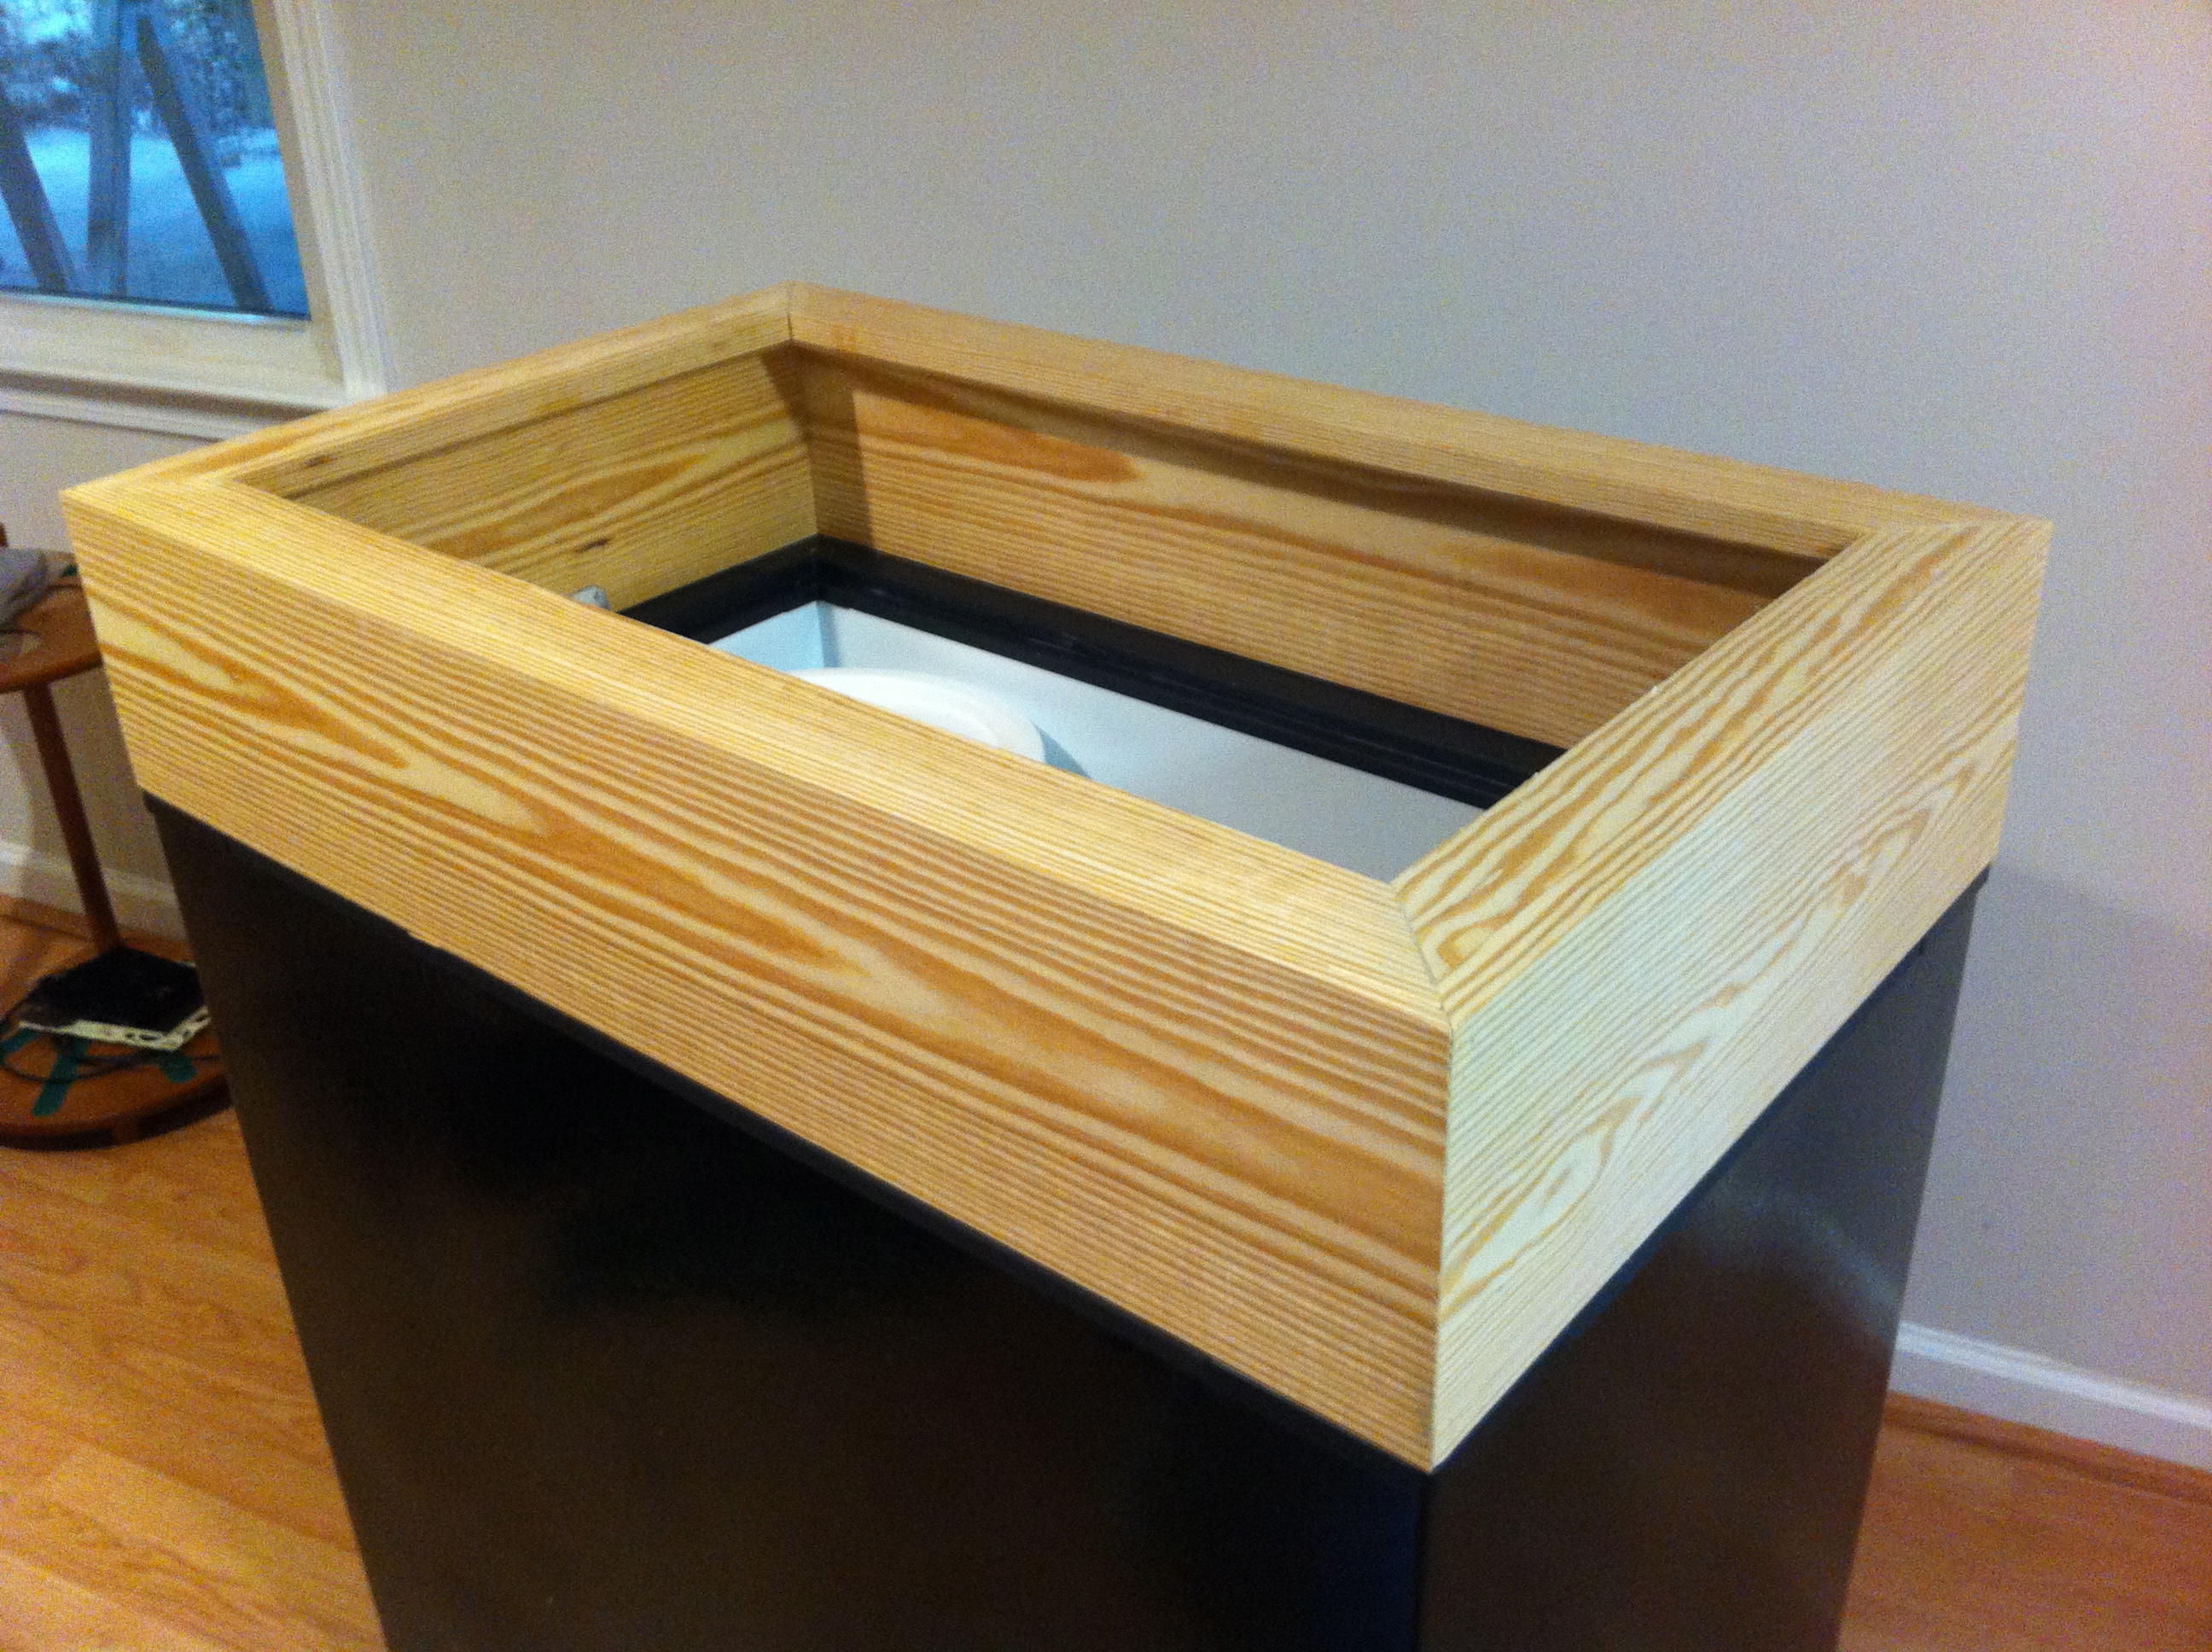
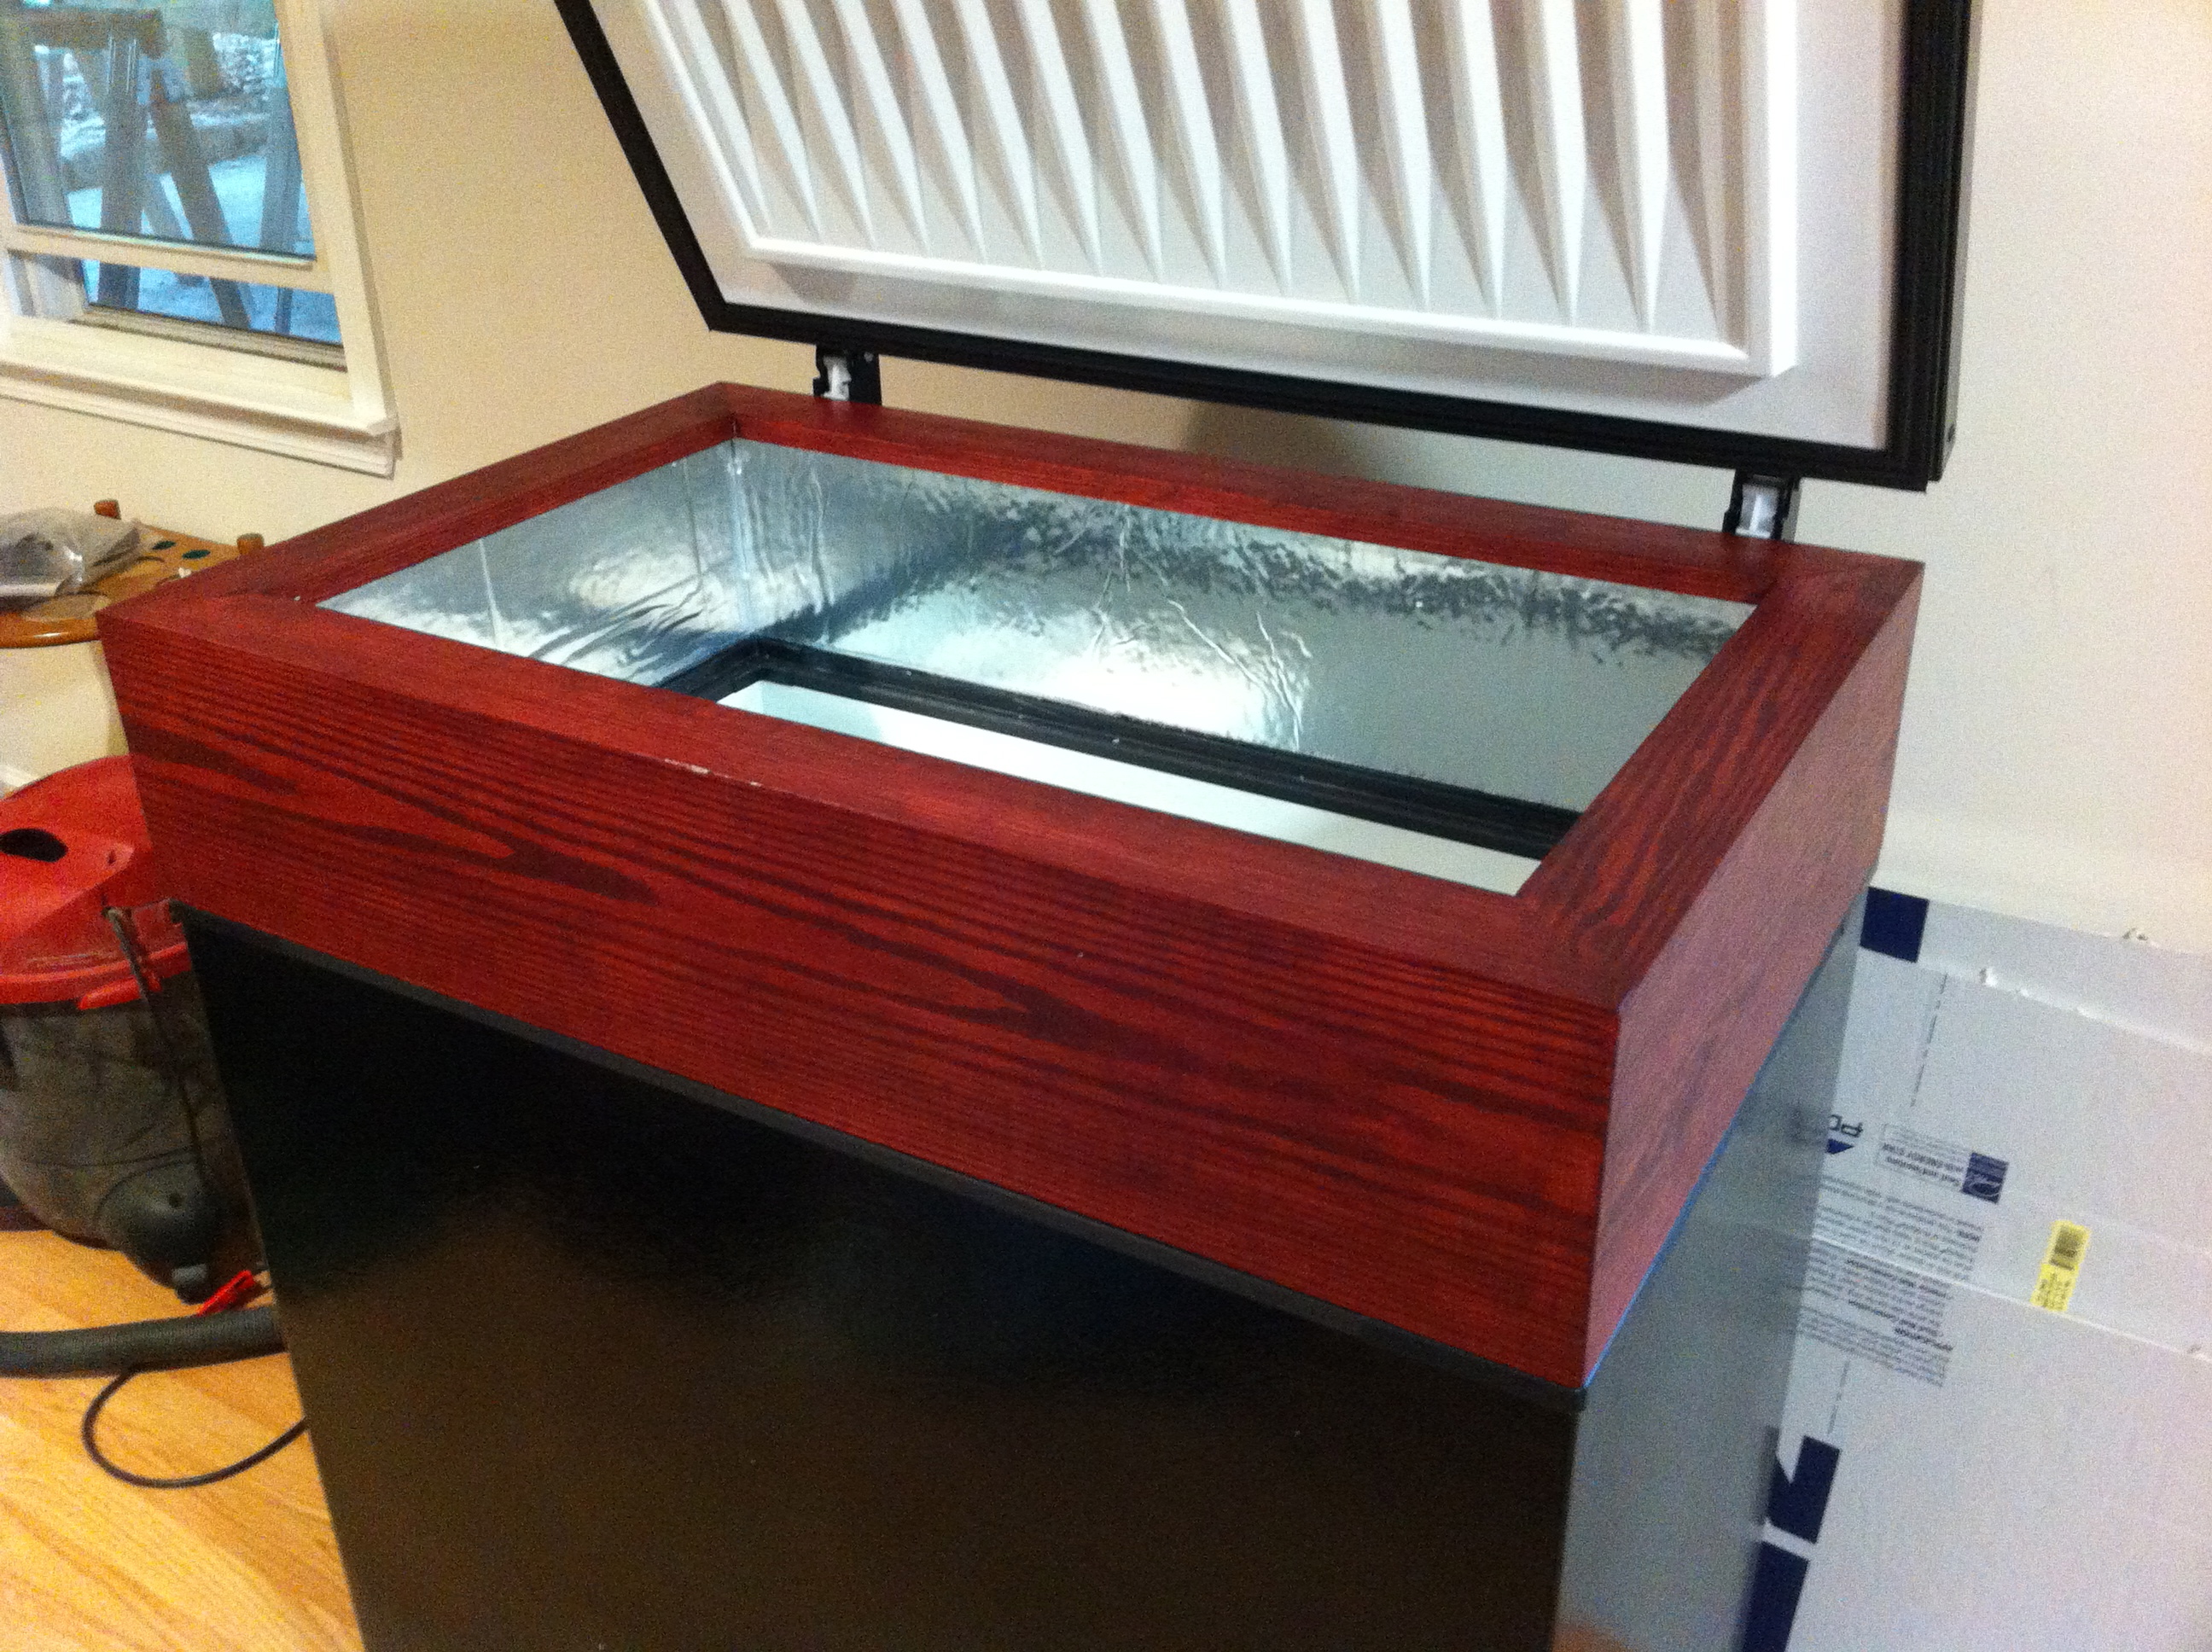
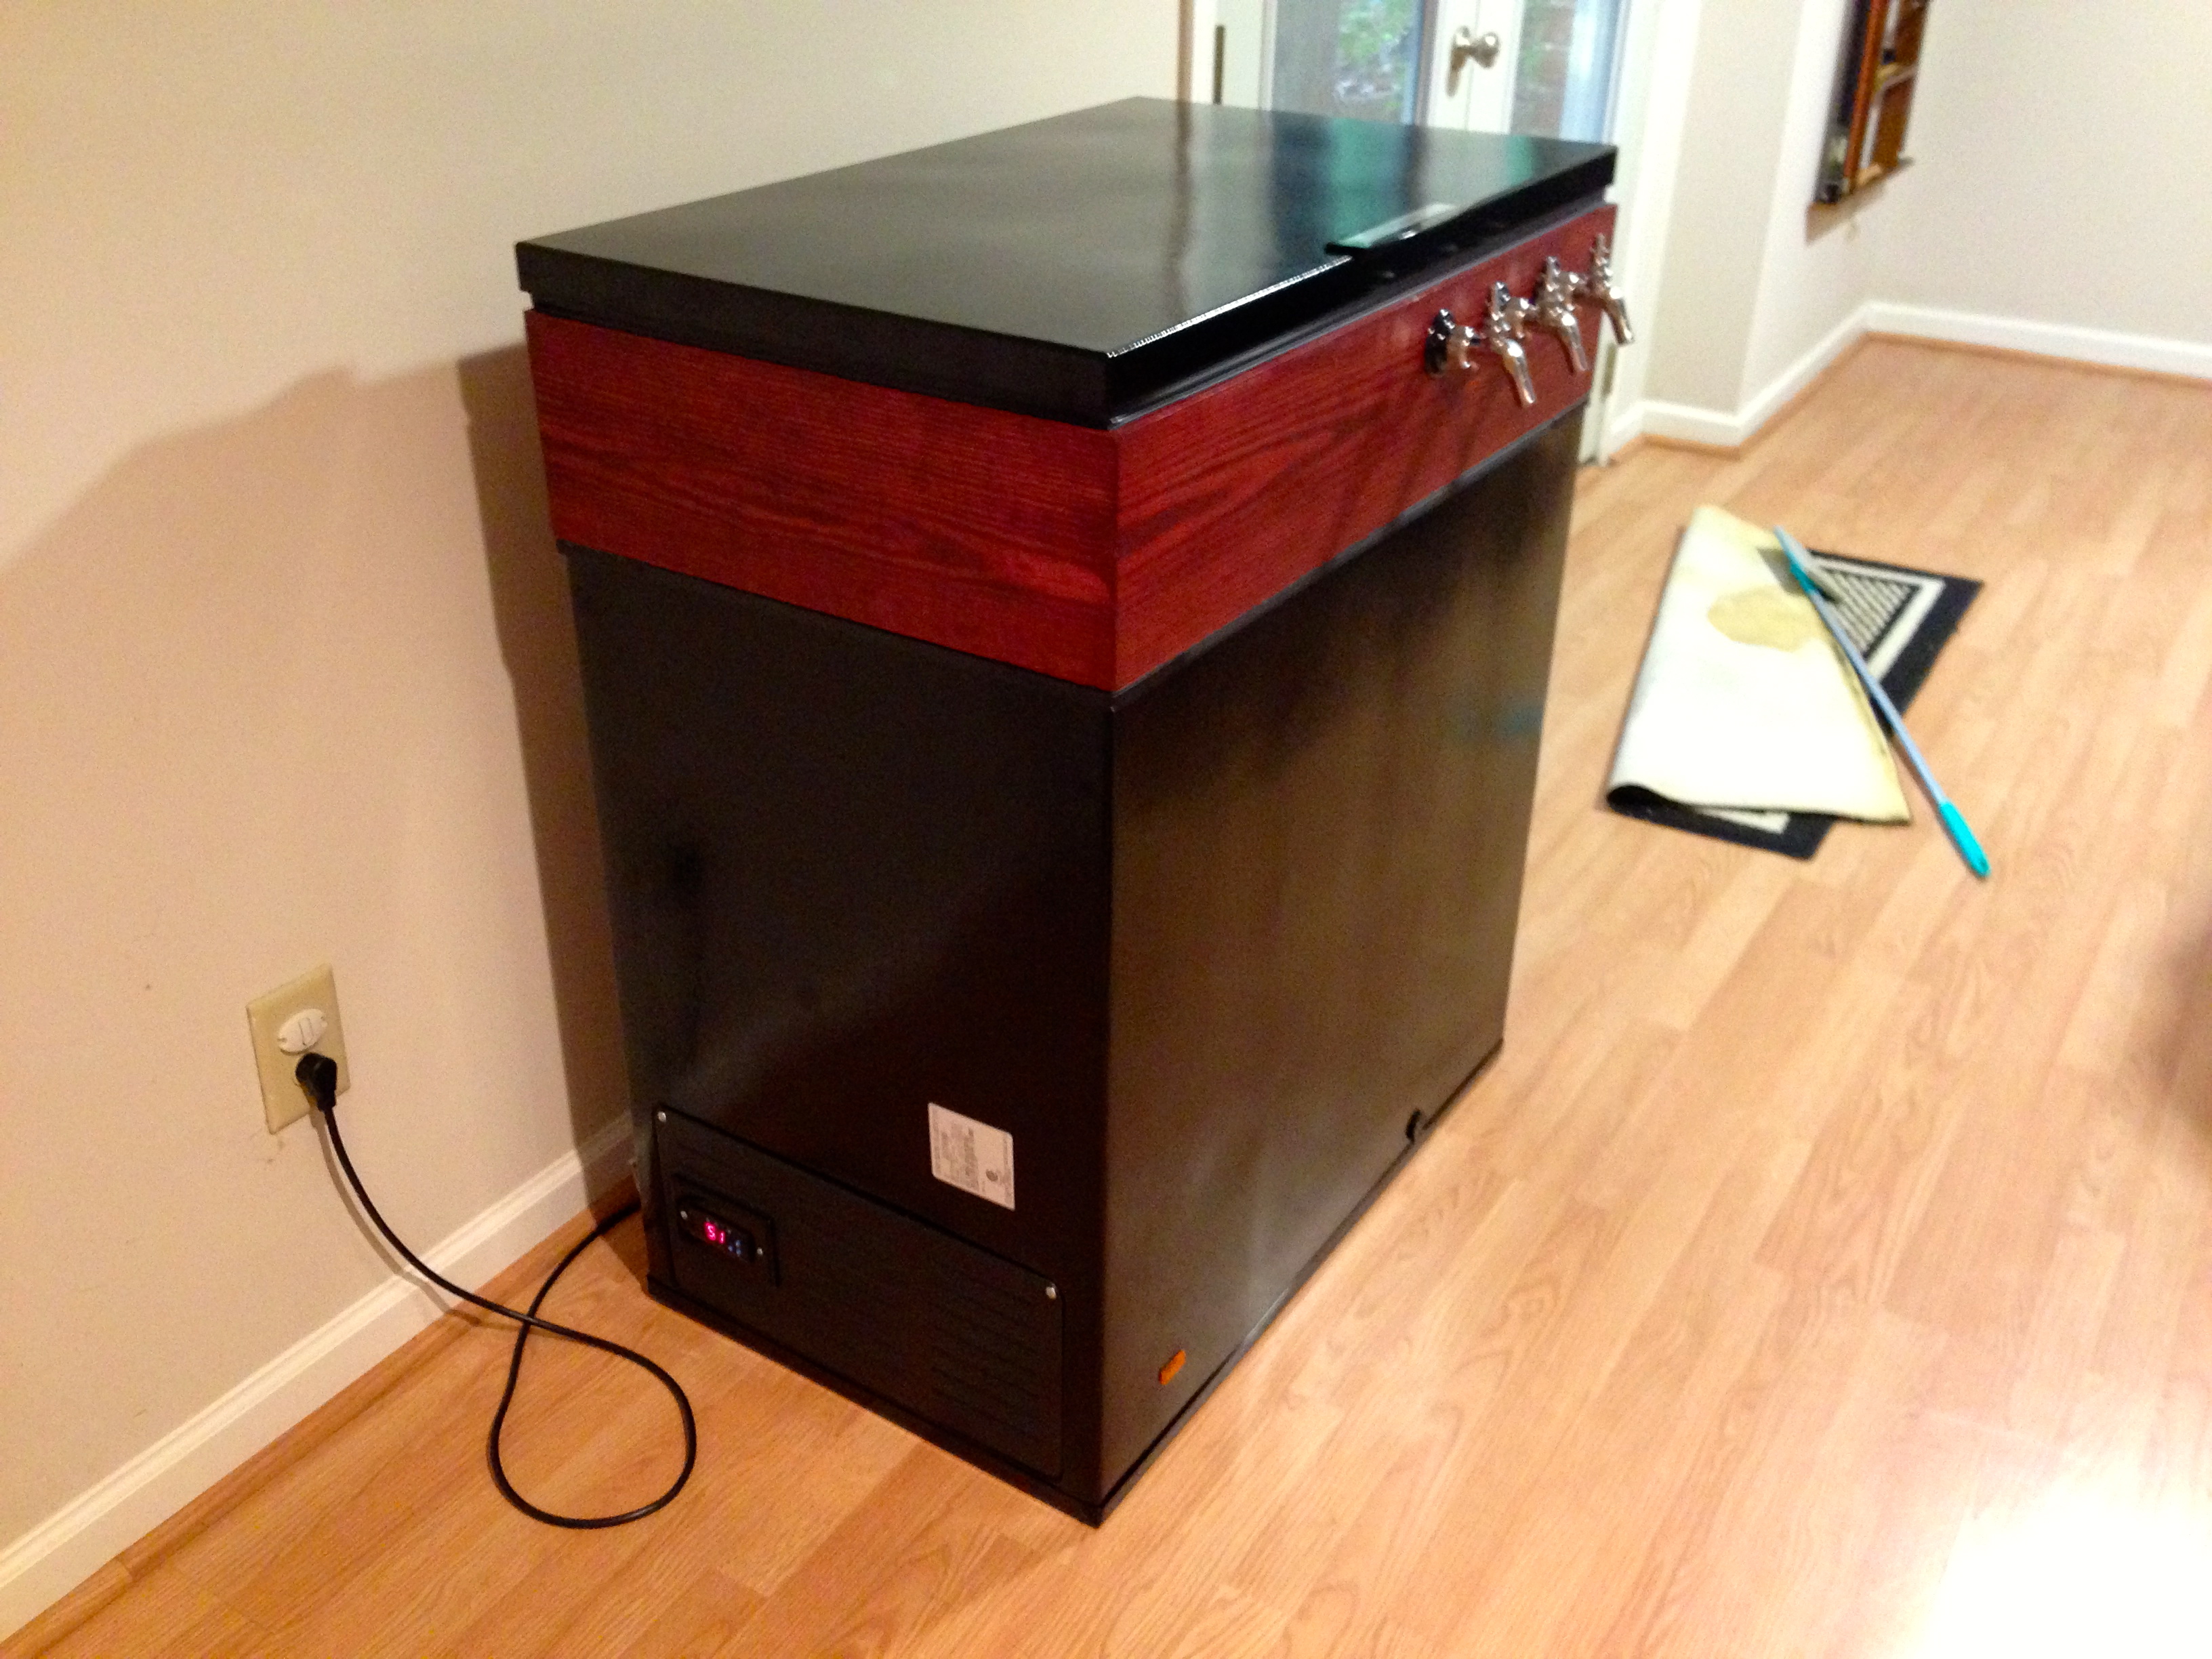
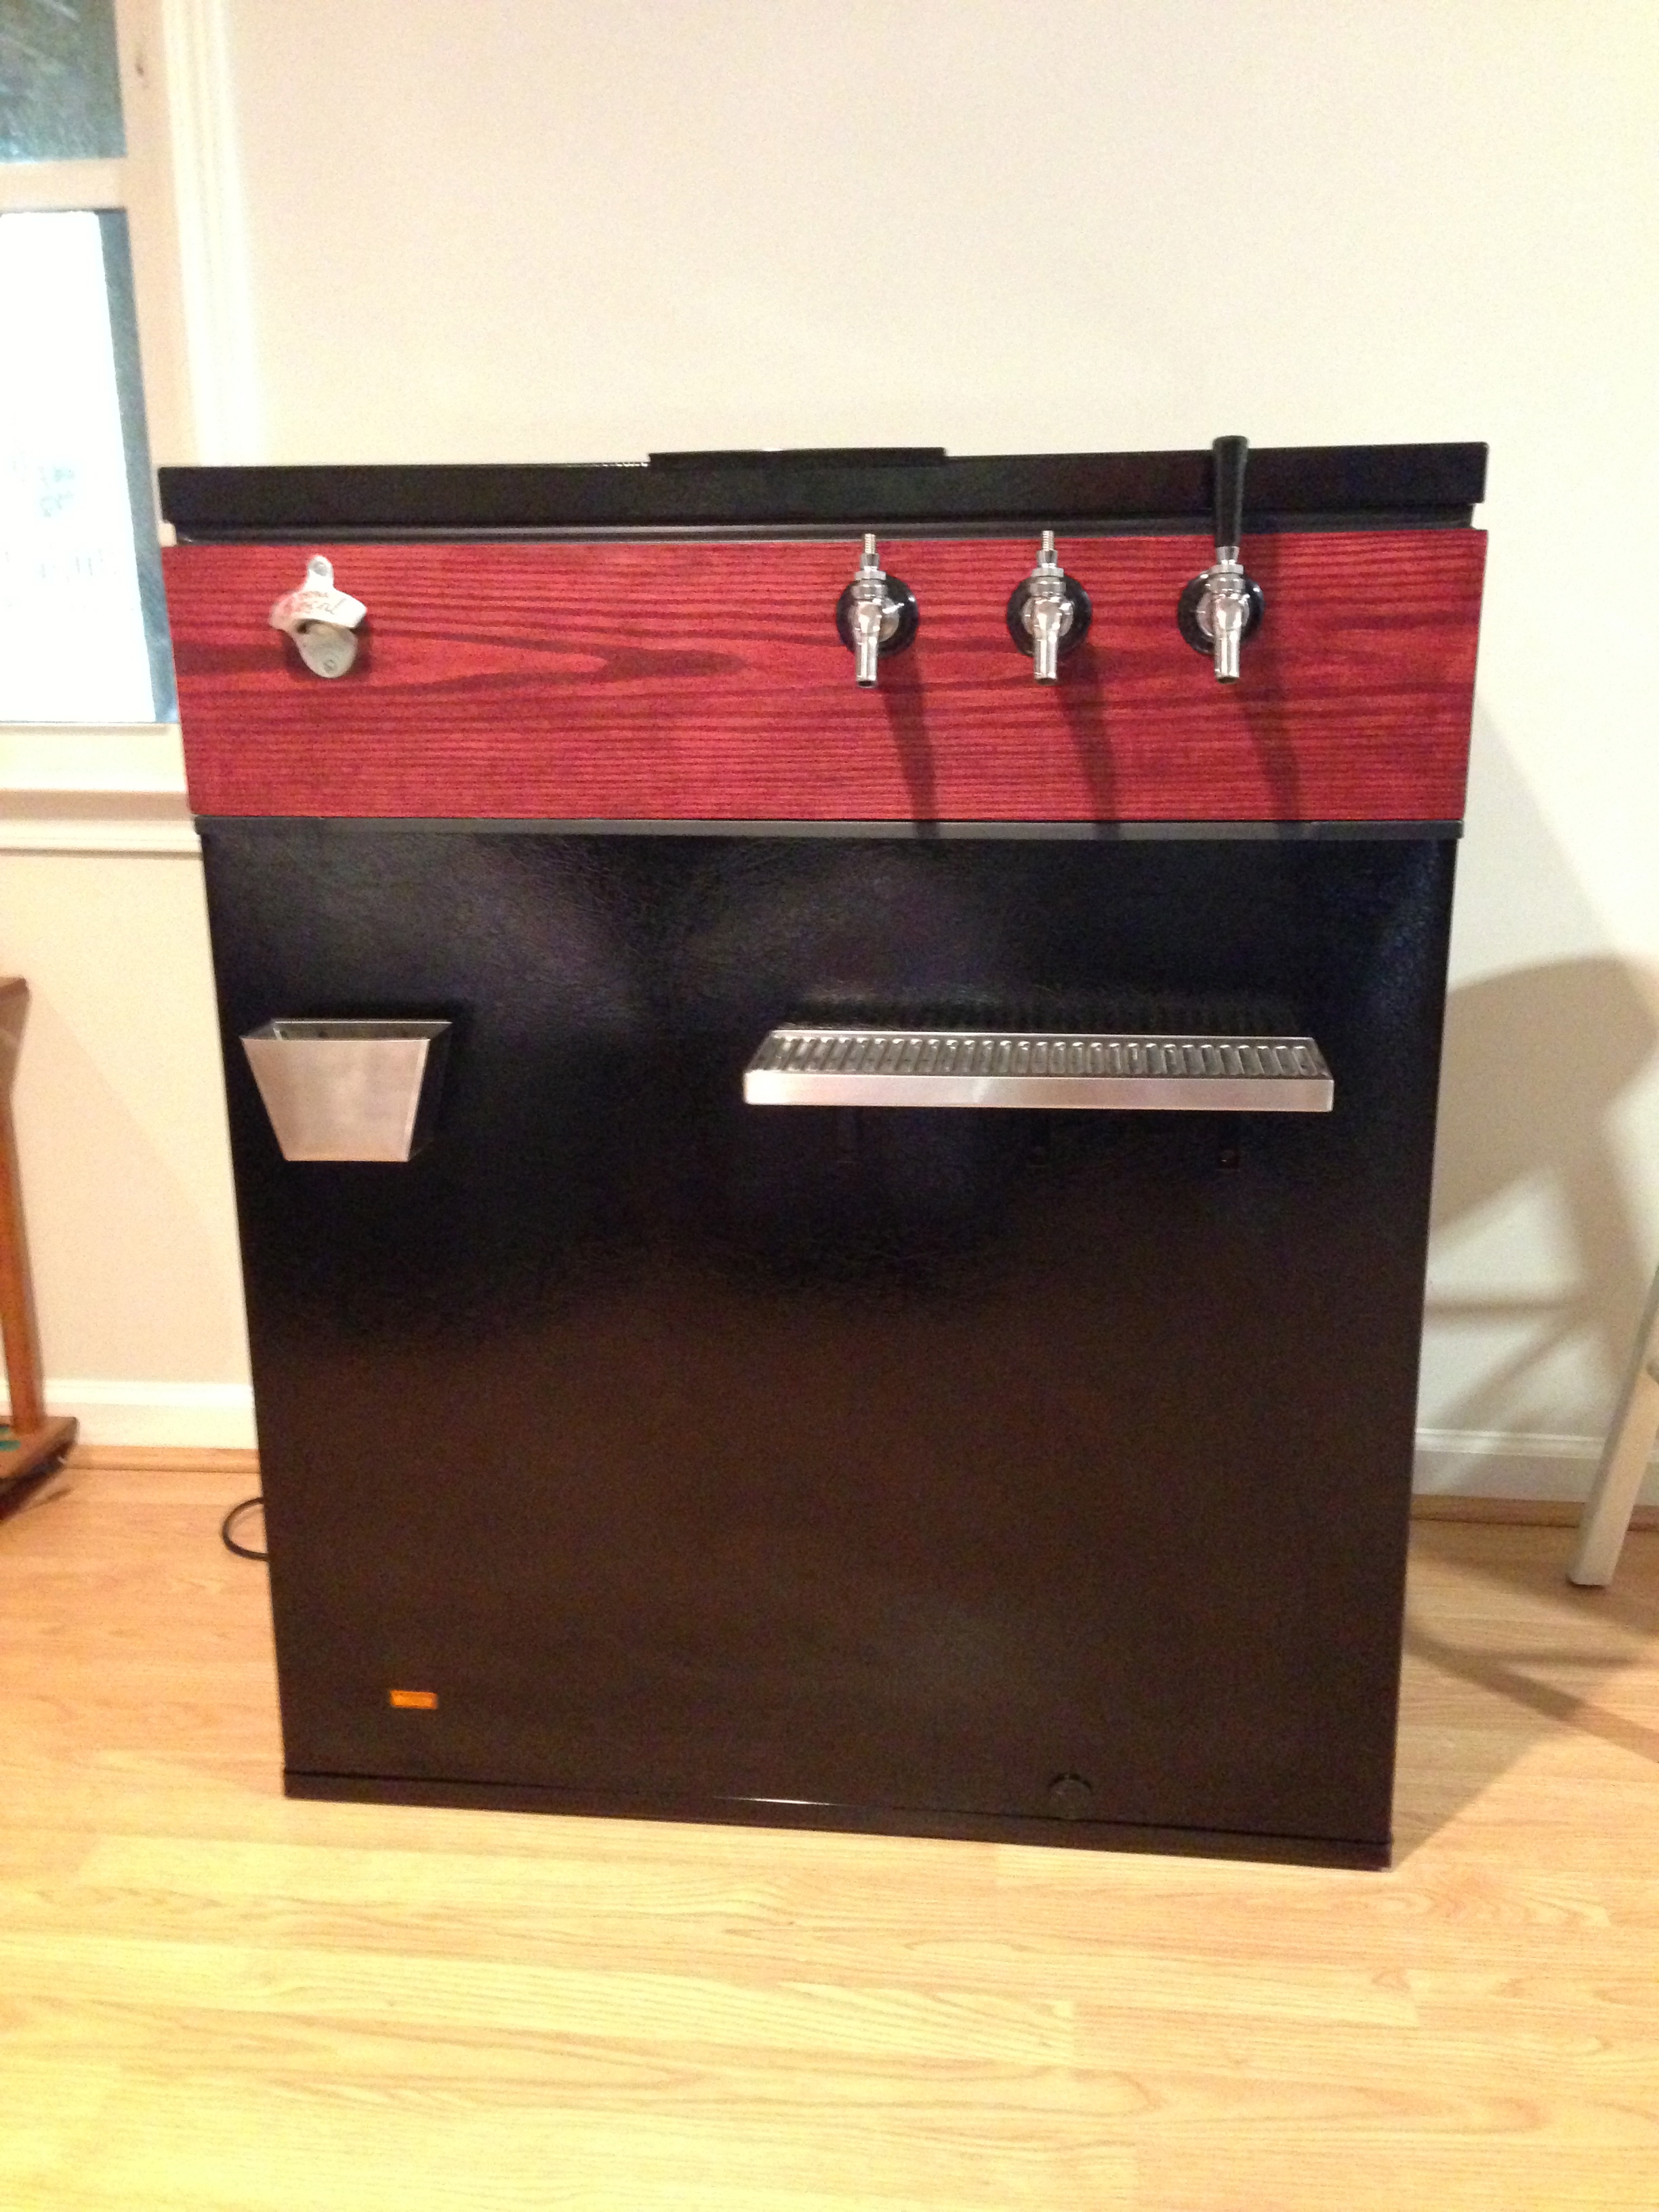
Next we need to have some place to put our faucets that we will pour the beer from. With chest freezers the walls of the freezer are the coils for the cooling system, so we can’t drill in there as we could hit a coil and this project would be over. The simplest solution to this is to put a insulated collar on top of the chest and move the lid to the collar. To complete this I used some 1×8 southern yellow pine that I stained and then insulated and sealed with 1″ foam and silicone. Sealing the unit air tight is very important as it keeps the inside cool and keeps moisture out.
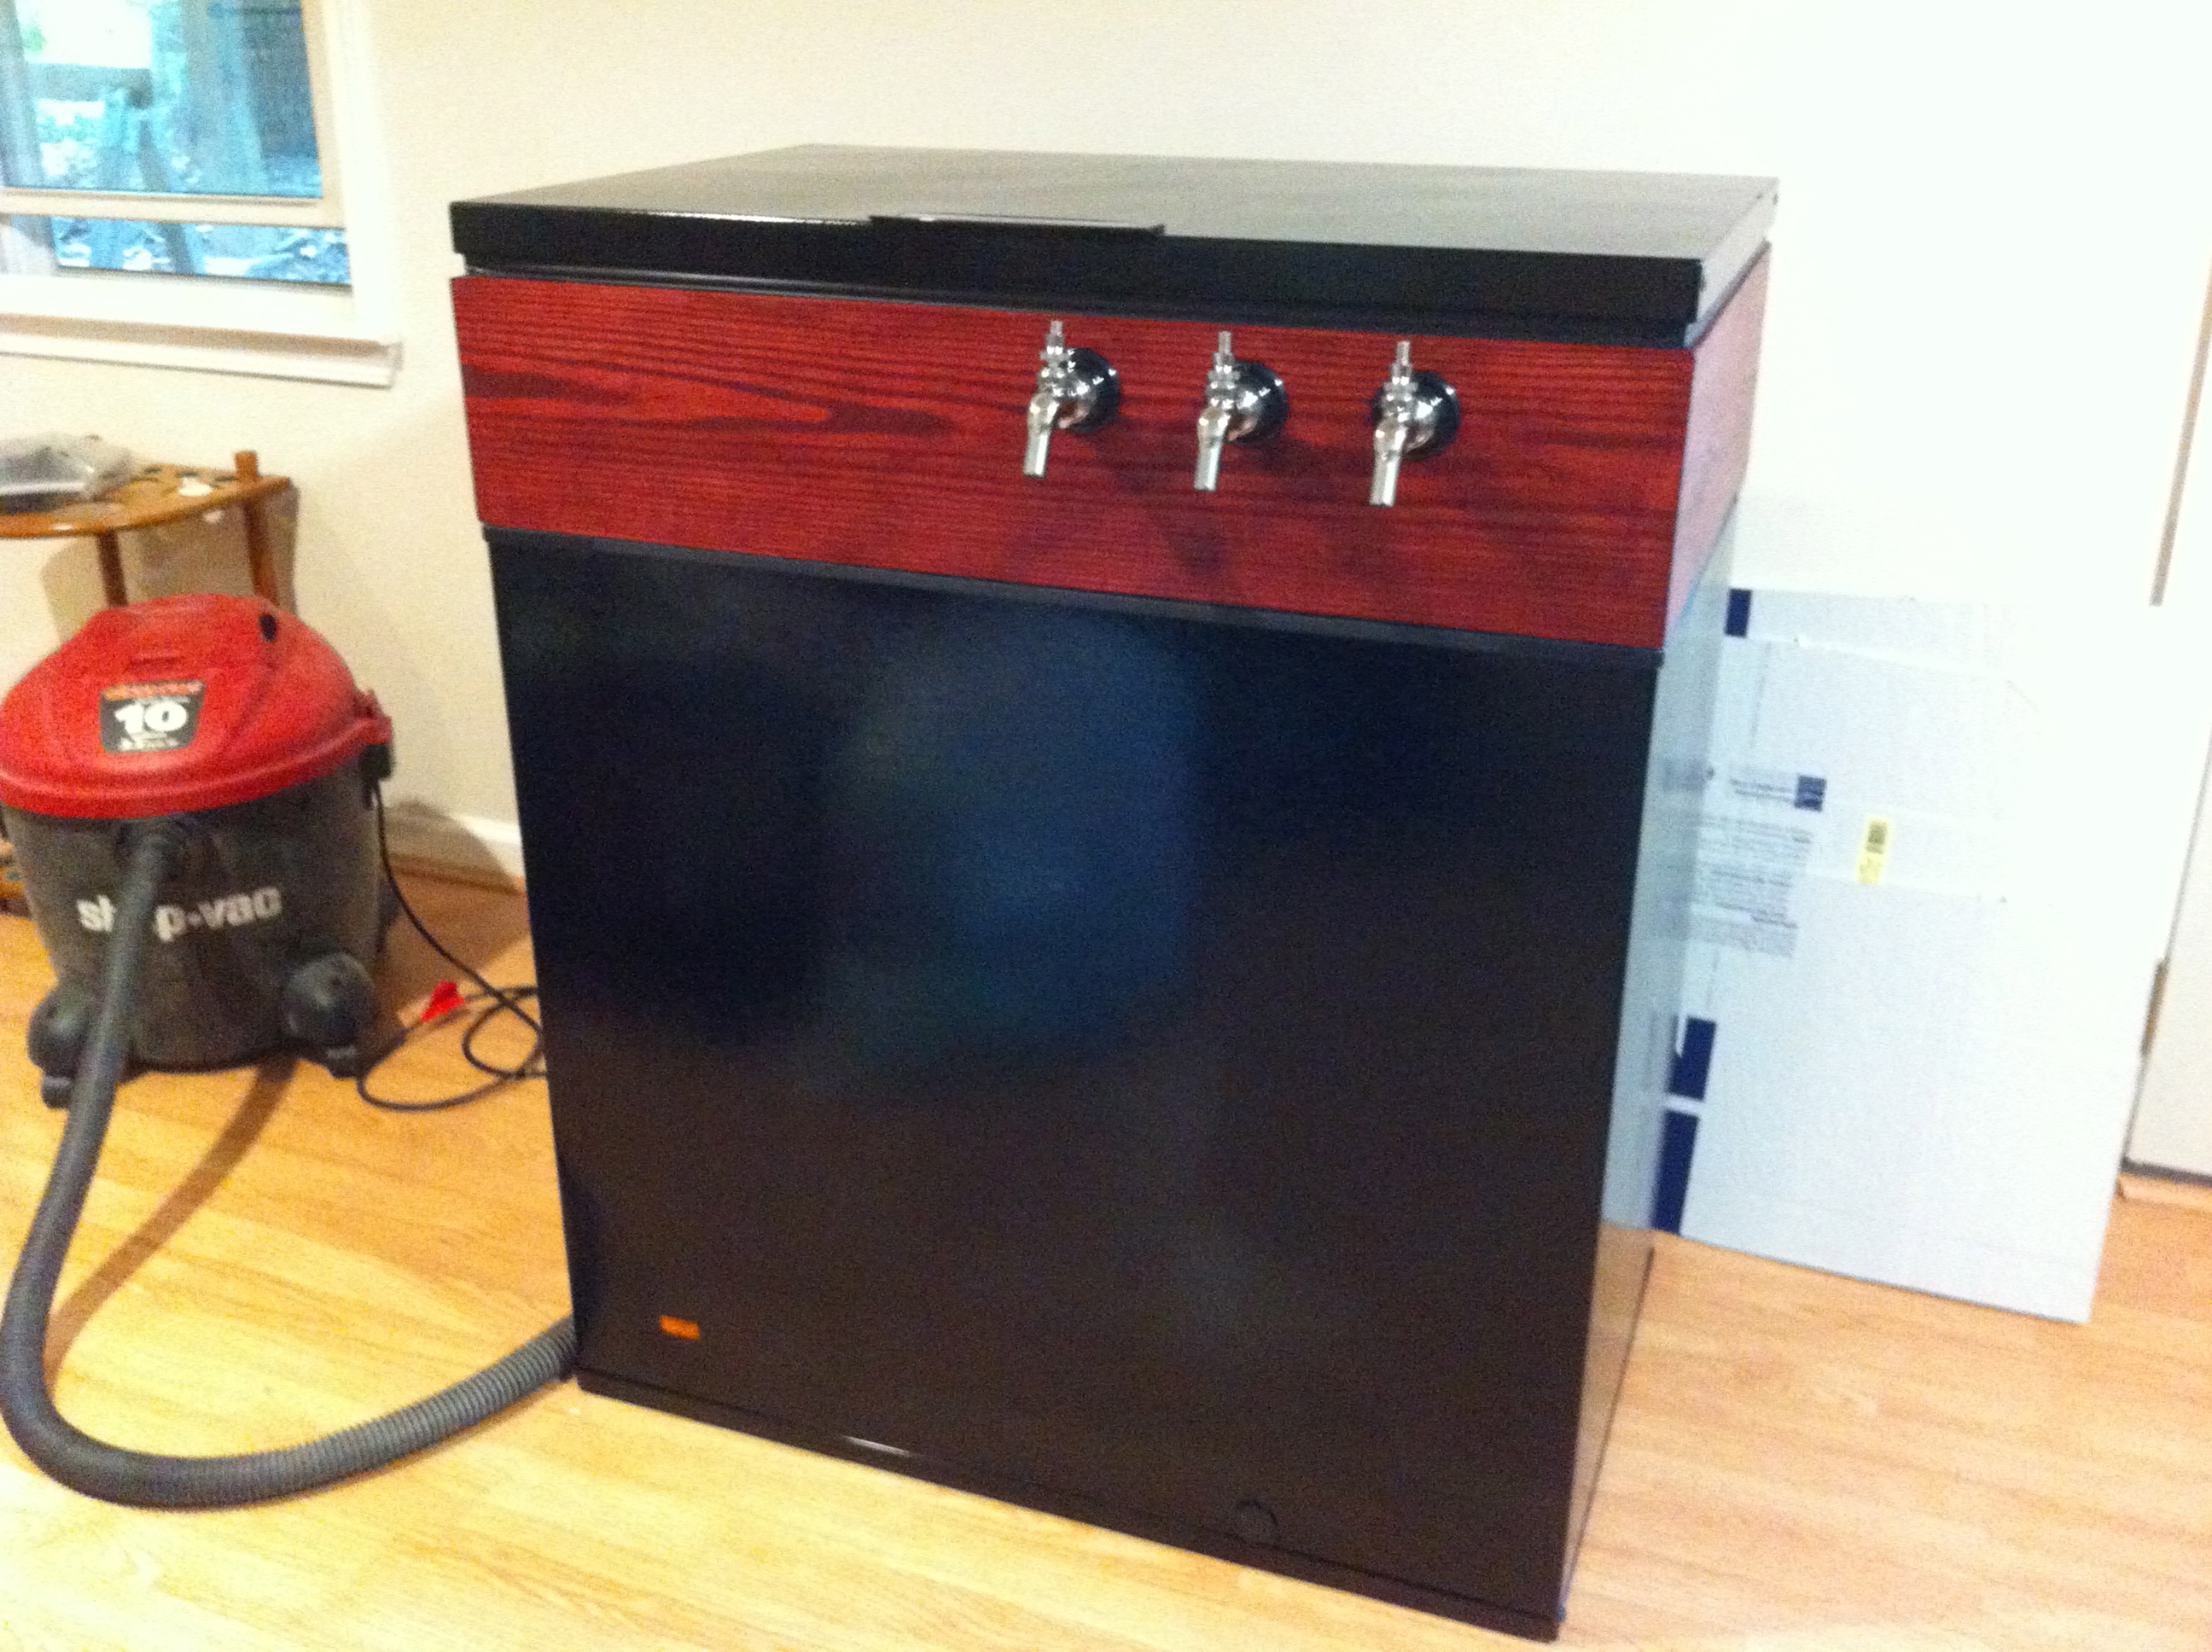
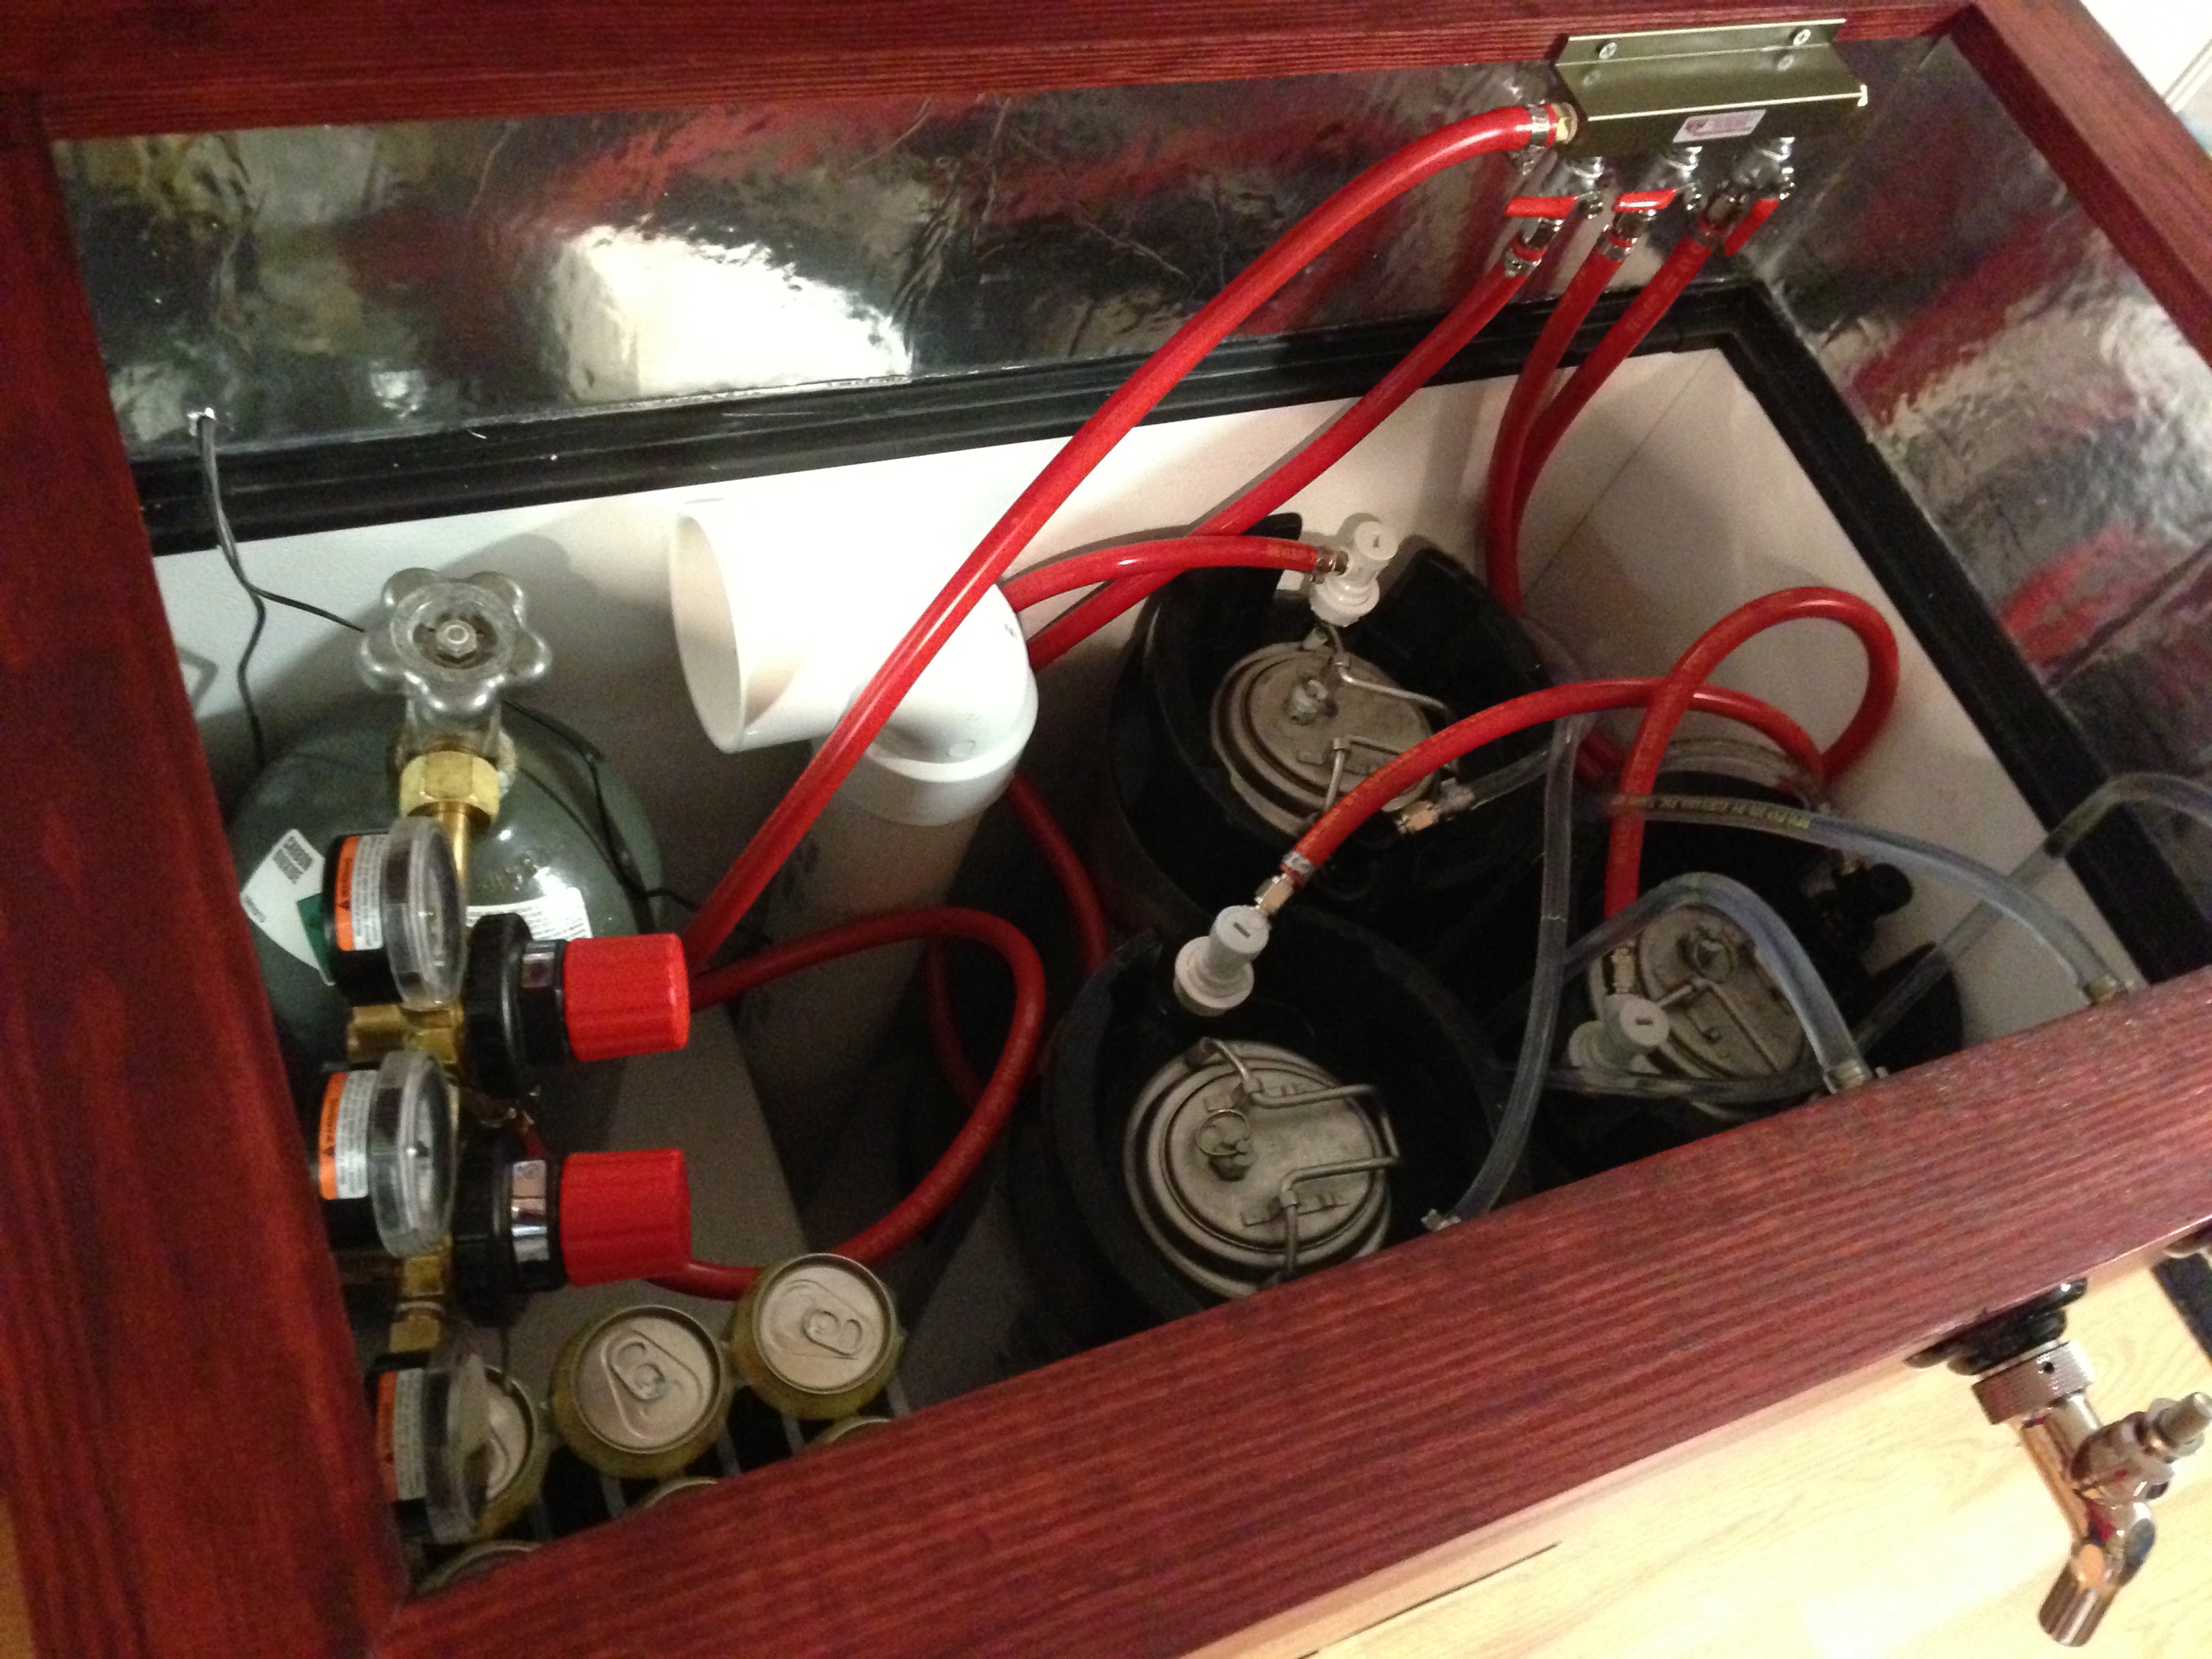
Finally we have all the plumbing, both the liquid and gas sides. This time I purchased complete kegerator a kit from kegconnection.com and some high end stainless steel faucets and shanks from kegoutlet.com. While stainless steel is more expensive, it’s best to use it instead of chrome plated brass which does wear out faster and is harder to keep clean. Keeping everything clean is important to both taste and health.
With a few finishing touches like a drip tray, cap catcher, and a bottle opener and this draft beer system is complete. Add some kegs full of beer and some CO2 and you’ll be ready to serve!


Nicely done and thanks for sharing! Cheers!
Hi there! I could have sworn I’ve been to this blog before but after looking at many of the articles I realized it’s new
to me. Regardless, I’m certainly happy I came across it
and I’ll be bookmarking it and checking back regularly!
great job on the keezer! That thing looks sharp and done very clean. I know you posted this a few years back but if you have any more specific information on the build you could share that would be great. I just came across a freezer that I want to convert for homebrews. Also, can you explain what the PVC pipe on the inside is? Dehumidifier?
thanks!
Mick
The PVC pipe is connected to a small PC fan the just circulates the air inside, it’s curved to not blow the cold air out when the top is opened! 🙂