
Living outside the United States sometimes we need to get creative to access the great internet services back home like SlingTV, Spotify, YouTube, Pandora, etc… Most the time a DNS Redirection service works well but for some services only a VPN will work. Now I don’t want to run everything over the VPN as they can be slow at times, so setting us some simple rules on our router will take care of everything.
For this example I’m going to have my AppleTV use the VPN while other traffic does not. I’ll be using the latest build of Advance Tomato on my ASUS router and OpenVPN service from Smart DNS Proxy but this will work with most routers and VPNs though the setup might be different or manual.
Step 1: Assign Static IP Addresses to VPN Devices
The first step is to log in to our route and assign a static IP address to the AppleTV. We need to have a static IP address to assure the routing rules won’t change in the future if the AppleTV loses it’s lease.
Log in to the router and navigate to the device list, find the Apple TV and click the “Static” button below it. In this example my AppleTV is named Living Room.
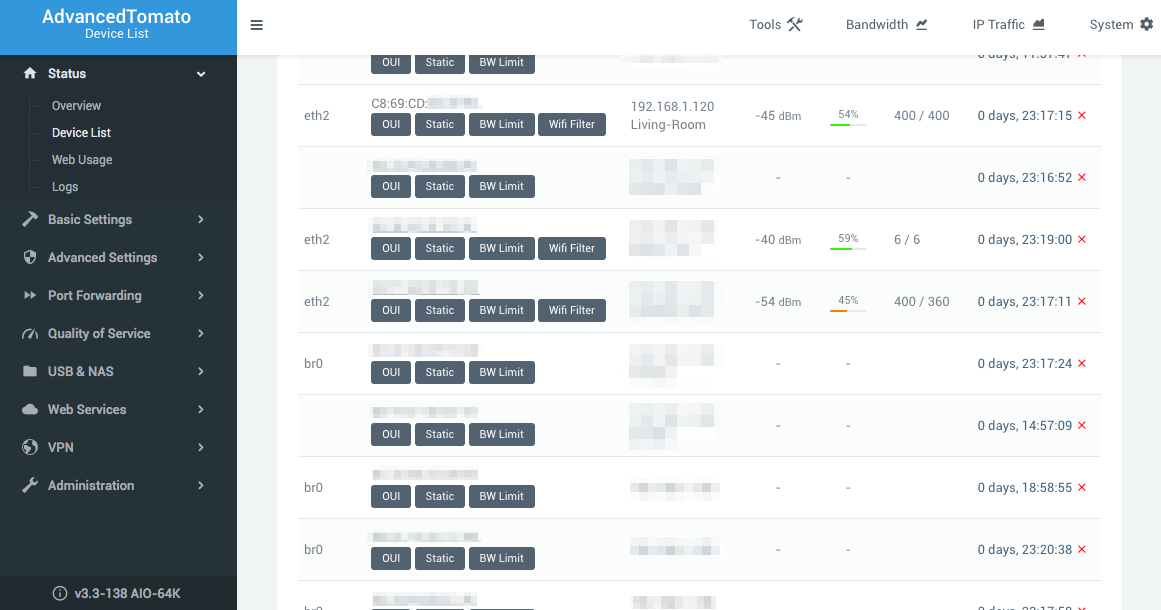
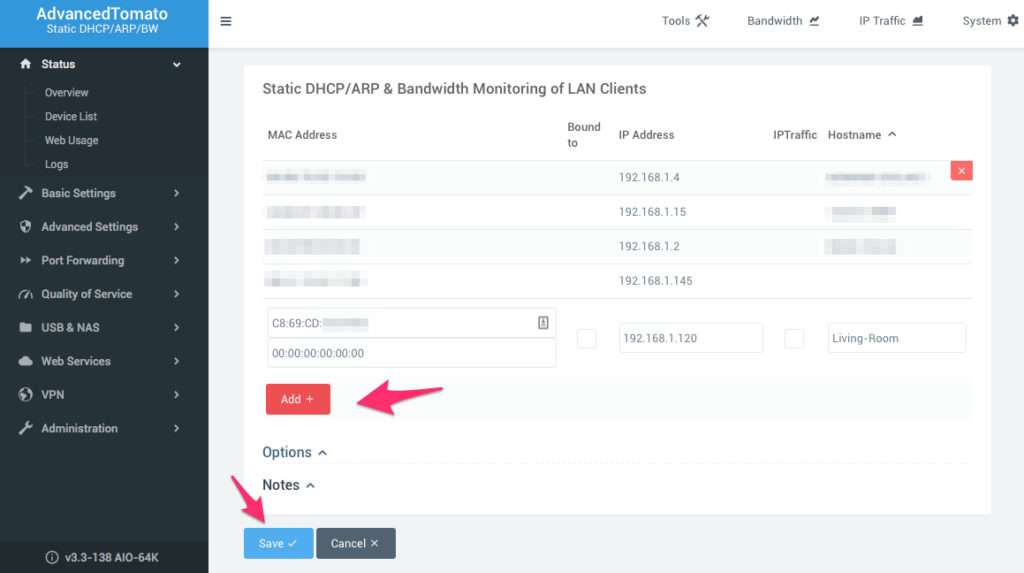
The form will pre populate with the correct rules so just click “Add” and then click “Save” to save this rule. Also at this point make a note of the IP Address assigned. In this case it’s 192.168.1.120.
Step 2: Setup the OpenVPN Connection
Following your VPN providers directions, setup your OpenVPN connection on the router. One big change that we willed to make from their directions is we want to issue the –route-noexec command so we can setup our own rules.
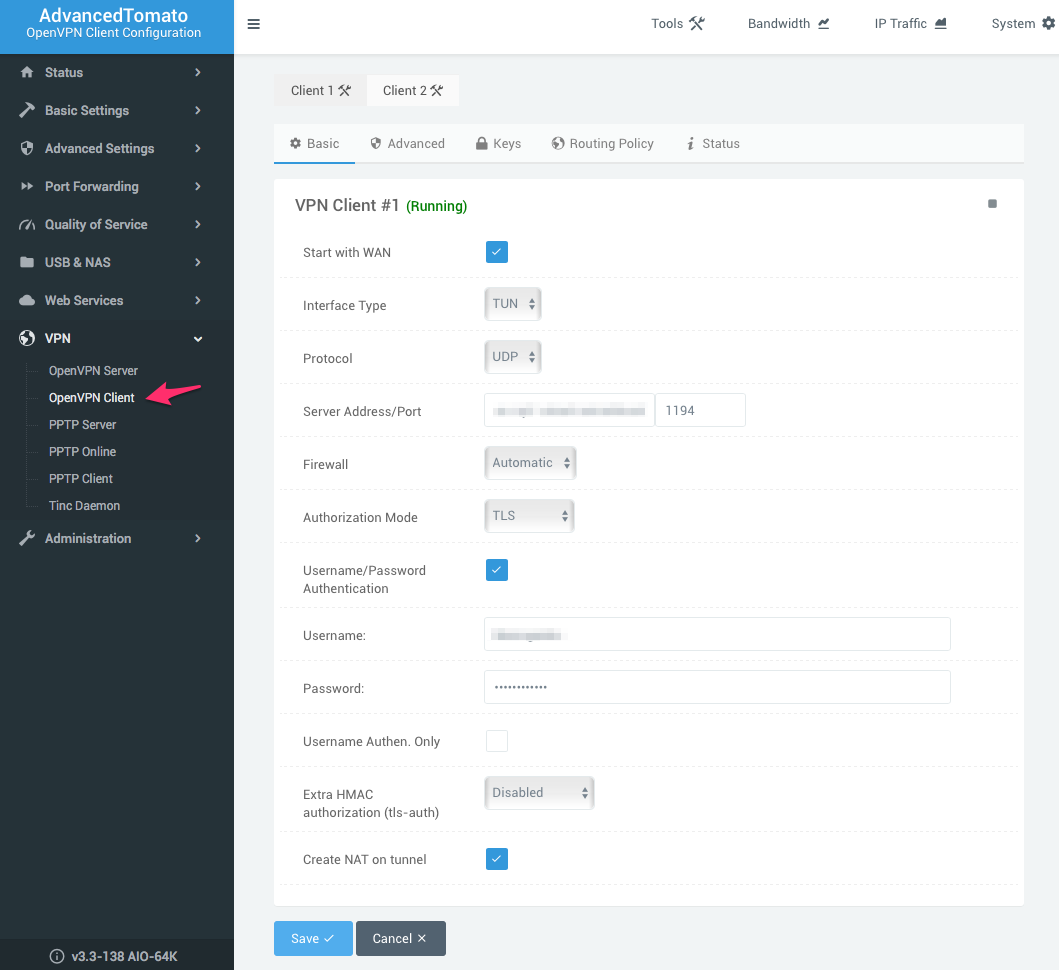
In our case with Smart DNS Proxy VPN we will follow their manual directions to setup a connection to their New York server. The setup on the Basic tab follow their directions as follows.
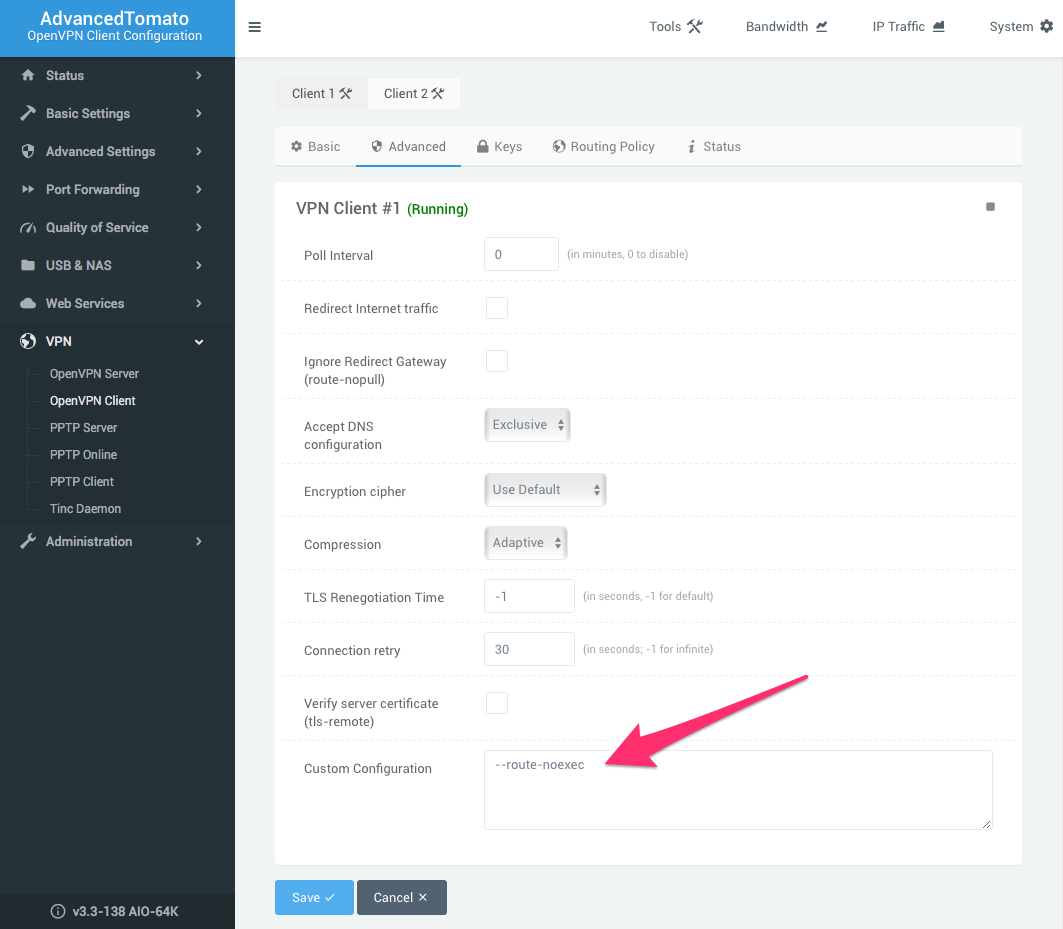
Next, on the Advanced tab is where we are going to make our custom change by adding the –route-noexec command in the custom configuration box.
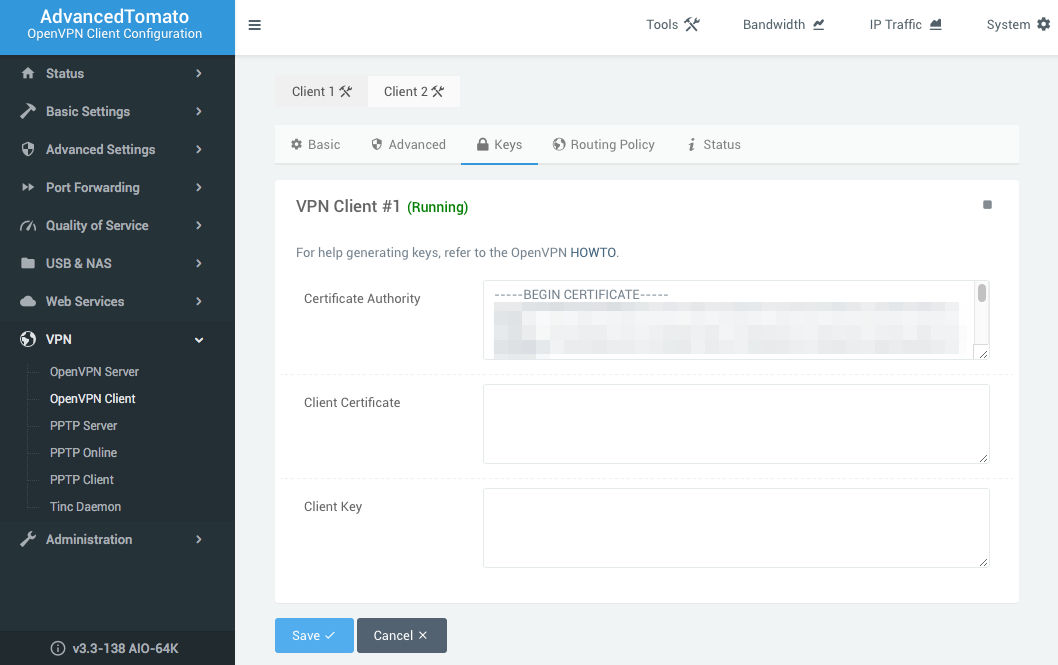
Add the certificate on the Keys tabs as directed by your provider.
And finally one the Routing Policy tab is where we can add our custom routing rules for the AppleTV. Here you will need that IP Address from earlier for the AppleTV, ours was 192.168.1.120. Add the IP Address and “From Source IP” and then click “Add” and then click “Save” to save all your changes.

What we just did was use the –route-noexec command to tell the router to not add any default VPN rules and then we added our own rule to the Routing Policy tab lets us tell the router what devices we want to send through the VPN.
Next click the Start icon to start the new client VPN and your AppleTV (or Roku, or XBox, or Play Station) will use the VPN default allowing access to geo-blocked services!
Step 3: There is No Step Three
That’s it, it really is that simple! Enjoy your video streaming!

Thanks, I have the same configuration. What if I would like to exclude a domain from this configuration and skip vpn for i.e. netflix leaving the rest with vpn?
What is the procedure in case of doing it the other way around, that is, to exclude an IP from the use of vpn?